

Last Updated: October 25, 2026
Quick Summary
To integrate smart technology into an outdoor kitchen, plan the electrical capacity and GFCI protection first, then solve Wi-Fi coverage to the cooking zone before buying any devices. A smart outdoor kitchen works best when built in priority tiers: electrical, connectivity, lighting, cooking automation, then audio and shading.
- All outdoor receptacles need GFCI protection, and any 240-volt appliance requires a licensed electrician.
- Signal better than about -67 dBm is solid, while below -80 dBm is where devices fall off.
- Most smart appliances only use 2.4 GHz, so don't disable that band on your network.
- Buy smart grills for temperature monitoring and preheat control, and confirm manual fallback controls work.
- IP65, dust-tight and water-jet rated, is a reasonable target over a covered cooking zone.
Table of Contents
- Start With Outdoor Kitchen Electrical Planning
- Solving Outdoor Kitchen Wi-Fi Before You Buy Devices
- Choose a Smart Grill With App Control You'll Actually Use
- Where Outdoor Kitchen Automation Pays Off
- Lighting, Audio, and Shading That Respond to Weather
- Weather Protection, Compatibility, and What It Costs
- Shop the Smart Outdoor Kitchen Build With Expert Help
- Frequently Asked Questions
Start With Outdoor Kitchen Electrical Planning
Most smart outdoor kitchen failures start at the breaker panel, not in an app. To integrate smart technology into outdoor kitchens without frying devices or failing inspection, the electrical plan comes first.
Outdoor kitchen electrical planning is the process of mapping every powered device, its location, its power draw, and its dedicated circuit before construction begins. Skip it, and you'll be running extension cords across a patio for the next decade.
What the Electrical Plan Needs to Cover
Start with a written device list, every smart grill, light, fan, fridge, and speaker gets a line, then answer four questions for each:
- How much power does it draw? Check the label, not the marketing page.
- Does it need a dedicated circuit? Large cooking appliances usually do.
- Where does the outlet go? Plan for the cord, not just the device.
Two hard rules apply here. First, all outdoor receptacles need GFCI protection, which is required by the National Electrical Code requirements for outdoor outlets. Second, any 240-volt appliance needs a licensed electrician.
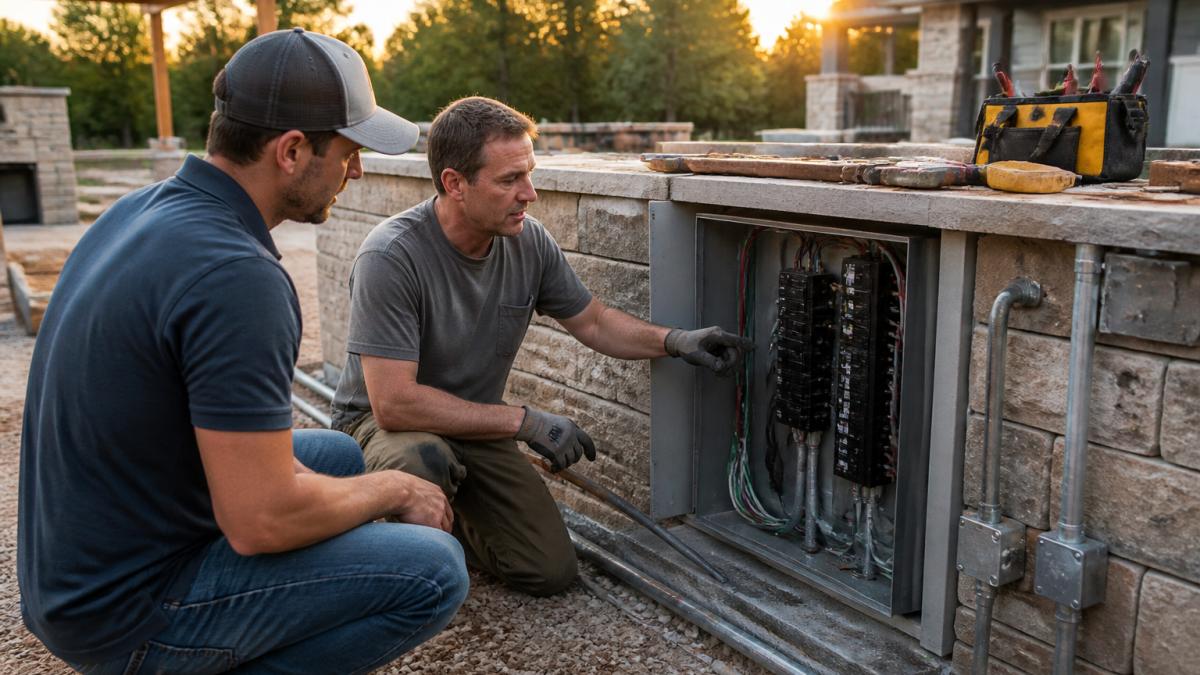
Pull more capacity than you think you need. Smart devices multiply, and an unused circuit costs far less now than trenching later.
If you're still deciding where everything goes, our guide on how to plan an outdoor kitchen layout walks through the full sequence before wiring decisions. And if a gas grill is part of the plan, read our outdoor kitchen gas line installation tips so the electrical and gas rough-ins don't collide.
Solving Outdoor Kitchen Wi-Fi Before You Buy Devices
Outdoor kitchen Wi-Fi is the step almost everyone skips, then they wonder why the grill drops off at the far end of the yard.
The fix is a second access point or a mesh node mounted near the patio, ideally under cover. Run an Ethernet cable during construction if you can. Wired backhaul beats wireless every time, and it's the single highest-leverage decision you'll make on the connectivity side.
Assess Signal Before You Buy Anything
Don't guess at coverage. Walk the patio with a free Wi-Fi analyzer app and note signal strength in dBm at three points: the cooking zone, the seating area, and the farthest chair. Better than about -67 dBm is solid; -70 to -75 dBm is marginal; below -80 dBm is where devices fall off. Those numbers tell you whether one node will do or you need a second.
Mesh Node vs. Access Point: Pick the Right Architecture
These are not the same thing, and the difference matters outdoors.
- A mesh node is easiest to add, plug it in, pair it with the existing system, done. It's the right call for most patios, especially if the main router is already a mesh system. The trade-off is that a wireless mesh hop halves throughput at each hop, so a node placed too far from its parent will be slow even when it shows "connected."
- A wired access point is the better long-term answer when you can run cable during construction. It broadcasts a full-strength signal from a fixed location and doesn't depend on a wireless backhaul. If you're trenching for electrical anyway, pull Cat6 in the same trench (in its own conduit, separated from line voltage) and thank yourself later.
A common pattern: mount the node or AP under a covered patio ceiling, in line of sight of the cooking zone, aimed at the seating area, not just the grill. Test at the farthest chair before the hardscape goes down; moving a node six feet afterward is a much bigger job.
Band Selection and the 2.4 GHz Reality
2.4 GHz travels farther through walls and stone than 5 GHz, and most smart appliances only use 2.4 GHz, so don't disable it. Many "my grill won't connect" tickets trace back to 2.4 GHz being off or merged into one SSID with band steering the appliance can't negotiate. If you can split the bands, put smart appliances on 2.4 GHz and phones and streaming on 5 GHz.
Placement Mistakes That Kill Signal
Placement matters more than brand. A few failure modes show up again and again:
- Burying the node inside a metal cabinet. Signal dies fast in there. Mount it outside the enclosure, under cover.
- Direct sun and rain exposure. Even "outdoor" networking gear degrades faster in full sun; shade and a drip edge extend its life.
- Placing the node behind a stone or masonry wall between it and the cooking zone. Stone is a signal killer; line of sight is the goal.
Troubleshooting When Devices Drop
When a device won't stay connected, work through it in order: confirm it's on the 2.4 GHz network, check dBm at its exact location, reboot the node and device, and check for a firmware update. If it connects but the app lags, the problem is usually the backhaul, move the node closer to its parent or switch to a wired AP. Keep a written record of which device is on which network and where each node sits; it turns a two-hour session into a ten-minute one.
Choose a Smart Grill With App Control You'll Actually Use
Most people use two app features and ignore the rest: temperature monitoring and preheat control. Buy for those.
What's not worth it: gimmick features you'll never open twice. Ask one question, will I use this on a Tuesday?
For a gas grill with built-in lighting and serious cooking power, the Blaze 40-Inch 5-Burner Premium LTE+ Gas Grill pairs 80,000 BTUs of total output with a rear infrared rotisserie burner and heat zone separators.

If precise readings matter more than connectivity, the Echelon Digital Temp with Magic Window replaces analog dials with a sealed digital display that resists glare and steam.

Where Outdoor Kitchen Automation Pays Off
Outdoor kitchen automation earns its keep in a few specific places. Not everywhere.
The wins:
- Temperature alerts so you don't overcook an expensive cut.
- Scheduled lighting that turns on at dusk without you thinking about it.
- Remote preheat so the grill is ready when guests arrive.
The losses: anything you have to open an app to do while standing right next to the device. A physical knob beats a menu every time.
Echelon Digital Temp w/ Magic Window NG →
That's why manual fallback controls matter. If the Wi-Fi drops mid-cook, you need to finish dinner anyway. Before you buy, confirm the appliance works fully without the app.
Lighting, Audio, and Shading That Respond to Weather
Automated lighting is the highest-satisfaction upgrade in most builds, and the simplest.
Look for fixtures rated for wet or damp locations. The DOWN LIGHT PRO 12W RGBWW carries an IP65 rating, tunable white from 2700K to 5700K, and a 50,000-hour rated life.
Audio follows the same logic: outdoor-rated speakers, one control app, volume presets for dinner versus background. Two zones is plenty for most patios.
Automated shading is where weather-responsive automation shines: retractable awnings tied to weather sensors close before a storm hits, and precipitation and extreme-temperature detection protect the fabric and furniture underneath.
Weather Protection, Compatibility, and What It Costs
Weather protection is not optional for connected devices. Heat, moisture, and UV kill electronics faster than anything else. Look for sealed housings, IP ratings, and covers designed for the specific unit.
Reading IP Ratings Like a Buyer, Not a Browser
An IP rating has two digits: solids first, water second, and for an outdoor kitchen, the second is the one that matters. IPX4 handles splashes, IPX5 jets, IPX6 powerful jets, IPX7 temporary immersion. IP65 (dust-tight, water jets) is a reasonable target over a covered cooking zone; anything taking direct rain or spray should be rated for it explicitly, don't assume "outdoor" on the box means "exposed." Heat matters too: electronics inside a grill cabinet see far higher ambient temperatures than patio air, so ventilate them and keep them off the hottest surfaces.
Compatibility: Check Three Things Before You Buy
Compatibility is the quieter problem, and it's the one that produces the most expensive mistakes. Before buying, check three things:
- Protocol: does it use Wi-Fi, Bluetooth, or a proprietary hub? A device that only works through a manufacturer's hub is only as good as that hub's continued support.
- Ecosystem: does it work with the voice assistant and smart-home platform you actually own? "Works with" claims vary, check the manufacturer's compatibility list, not the product page badge.
- App longevity: has the manufacturer kept its app updated? A smart outdoor kitchen built on a dead app is just a regular kitchen with extra steps.
A practical rule: prefer devices that expose a standard control path (Wi-Fi with a documented API or a major-platform integration) over ones locked to a single proprietary app. It costs nothing now and protects you when a vendor changes course.
Privacy and Account Security
Treat outdoor devices like any connected device: change default passwords on day one, keep the guest network separate from your home network (a two-minute job that keeps a compromised grill from becoming a path to your laptop), enable two-factor authentication where supported, and check the privacy policy for what data the app collects and shares. None of this is exotic; it's just rarely done.
What It Costs: Priority Tiers, Not a Single Number
Costs vary widely by scope, so plan in tiers rather than around one figure. A lighting and Wi-Fi upgrade is a modest add-on; full cooking automation with a premium grill runs considerably more.
A workable priority order for most builds: (1) electrical capacity and GFCI protection, (2) Wi-Fi coverage to the cooking zone, (3) lighting, (4) cooking automation, (5) audio and shading.
Maintenance and Seasonal Storage
Specific care makes the difference between a five-year and a fifteen-year installation:
- Wipe down controls and screens after cooking; grease and steam are the enemy of sealed electronics.
- Inspect weatherproof covers and gaskets each season; a cracked cover is worse than none because it traps moisture.
- Pull or cover removable electronics before the first hard freeze if the manufacturer specifies a storage temperature range.
Protect the investment with a fitted cover. The Blaze built-in grill covers are made for compatible built-in units and keep rain and debris off the controls and electronics.
Plan the build in priority tiers, since costs vary widely by scope.
| Priority tier | What it covers |
|---|---|
| 1 | Electrical capacity and GFCI protection |
| 2 | Wi-Fi coverage to the cooking zone |
| 3 | Lighting |
| 4 | Cooking automation |
| 5 | Audio and shading |
Shop the Smart Outdoor Kitchen Build With Expert Help
The biggest risk in this project isn't technology, it's buying devices that don't talk to each other, or wiring a patio for yesterday's power needs.
Our challenge: write your device list this week, before you buy anything, then check the circuits and the Wi-Fi signal.
Get started with Urban Man Caves and build an outdoor kitchen that works as well as it looks.
Frequently Asked Questions
What smart technology can you use in an outdoor kitchen?
The practical shortlist is a connected grill with digital temperature monitoring, app-controlled or voice-controlled lighting, outdoor-rated audio, weather-responsive shading, and smart plugs for smaller appliances. A smart outdoor kitchen works best when you pick devices that share one control app or one voice assistant. Start with cooking and lighting, since those get used every session, then add entertainment and automation once the network and power are proven.
How do you get reliable Wi-Fi in an outdoor kitchen?
Treat outdoor kitchen Wi-Fi as a coverage problem, not a device problem. Run a mesh node or wired access point within roughly 30 to 50 feet of the cooking zone, mount it under a covered soffit rather than in direct sun, and keep it off the same circuit as large motors. Test signal at the grill with your phone before you buy connected appliances. If the signal drops below two bars, add a node before adding devices.
What electrical planning does a smart outdoor kitchen need?
Plan dedicated circuits, not shared ones. Outdoor kitchen electrical planning should account for the grill's ignition and lighting draw, refrigeration on its own circuit, lighting and audio on another, and GFCI protection on every outdoor receptacle. Confirm the total amperage with a licensed electrician and leave two spare outlets in the island for future devices. Underground feeder conduit sized one step larger than today's needs saves a trench later.
How much does it cost to add smart technology to an outdoor kitchen?
Cost tracks the appliance tier more than the smart features. Connected lighting fixtures run a few hundred dollars each, and a built-in outdoor induction cooktop is $1,529.00 from Urban Man Caves. A connected gas grill with digital temperature monitoring sits at the top of the range, such as the Echelon Digital Temp unit at $10,900.00. Budget separately for the electrician, conduit, and network hardware, which usually exceed the device cost.


