

Table of Contents
- Start With a Site Survey and Realistic Budget
- Choose a Layout Shape That Fits Your Patio
- Outdoor Kitchen Zone Planning: The Kitchen Triangle
- Outdoor Kitchen Clearance Requirements You Cannot Ignore
- Outdoor Kitchen Utility Placement: Gas, Water, Electric, Drainage
- Countertops, Cabinetry, and Weather-Resistant Materials
- Climate, Winterization, and Smart Integration
- DIY vs. Professional Installation: A Decision Framework
- Frequently Asked Questions
Last Updated: September 24, 2026
Start With a Site Survey and Realistic Budget
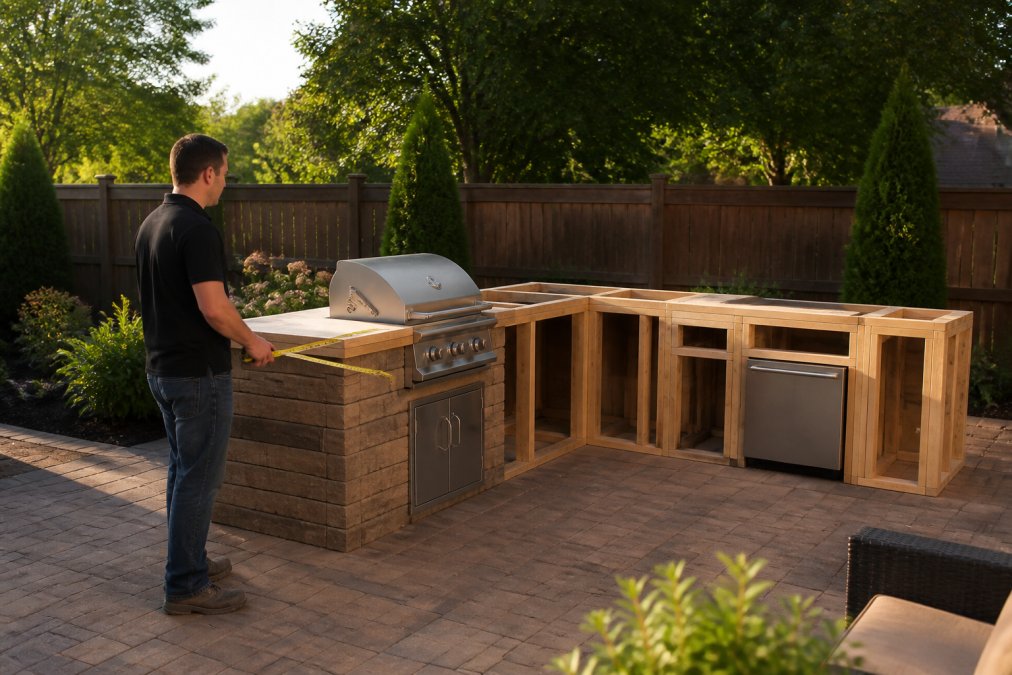
Learning how to plan outdoor kitchen layout starts with two unglamorous tasks: measuring your actual space and setting a budget you can live with. According to guidance from the National Association of Home Builders, outdoor living projects succeed when planning begins before any product is purchased.
Then build your budget in three buckets:
- Hardscaping and foundation: slab, footings, paving, drainage
- Utilities: gas line, water, electrical, permits and inspections
- Equipment and finishes: grill, refrigeration, cabinetry, countertops
Choose a Layout Shape That Fits Your Patio
The right layout shape is the one your patio can hold while keeping clear walking paths. Most residential patios accommodate one of four configurations, each dictating how you move, cook, and host.
L-Shape, U-Shape, Linear, and Island Configurations
An L-shape places two counter runs at a right angle, suiting corner patios and separating cooking from seating. A U-shape adds a third run for maximum counter space, though it demands a wider footprint and can feel enclosed on smaller lots. A linear layout runs everything along one wall, ideal for narrow spaces. An island sets a freestanding grill island apart from the main structure for a social cooking station.
| Layout | Best For | Watch Out For |
|---|---|---|
| L-Shape | Corner patios, medium yards | Dead corner storage |
| U-Shape | Large patios, heavy entertaining | Feels enclosed when small |
| Linear | Narrow spaces, tight budgets | Limited counter space |
| Island | Social cooking, open yards | Requires utility trenching |
Outdoor Kitchen Zone Planning: The Kitchen Triangle
Outdoor kitchen zone planning organizes your space around the classic kitchen triangle: prep area, cooking zone, and serving station. Keeping these three zones within a few steps of each other separates a kitchen that works from one that frustrates you.
Outdoor Kitchen Clearance Requirements You Cannot Ignore
Outdoor kitchen clearance requirements protect both your structure and your guests, and they are the numbers most DIY plans skip. The dimensions below reflect common residential practice and the International Residential Code (IRC) provisions most local building departments adopt, but always confirm exact figures with your authority having jurisdiction (AHJ) before you frame or pour.
Walkway and aisle clearances
- Main walkways: 36 inches minimum so two people can pass shoulder-to-shoulder. Bump to 42 inches if the path is also your primary route from house to seating.
- Between facing counter runs: 42 to 48 inches of open floor so cabinet doors and drawers open without blocking the aisle. A 48-inch aisle is the comfortable target if you host frequently.
- Behind counter seating: 32 to 36 inches from the counter edge to the wall or rail so stools and seated guests don't trap traffic.
- In front of the refrigerator: 36 inches minimum so the door swings clear.
Grill and appliance clearances
Fire safety clearance matters most around the grill, and numbers vary by fuel type and hood configuration:
- Gas grills: typically 24 inches from the back of the unit to any combustible wall, and 12 to 18 inches on the sides, but the manufacturer's installation manual governs. Built-in units often require more rear clearance than freestanding models because the hood radiates heat downward into the counter.
- Charcoal and wood-fired units: often require 36 inches or more to combustibles and a non-combustible landing surface beneath.
- Side burners and sear stations: treat as separate heat sources; each carries its own clearance spec.
- Above the grill: check the manual for minimum clearance to a combustible overhead structure. Under a pergola or roof overhang, this often forces a non-combustible hood or a taller opening.
How to verify clearances before you build
- Pull the installation manual for every appliance, grill, side burner, refrigerator, kegerator, pizza oven, and highlight every clearance dimension.
- Sketch your layout to scale and mark each clearance zone in a different color.
- Overlay your structure (walls, pergola posts, roof edge) and check for conflicts.
- Confirm the numbers with your local building department during permit review, not after the slab is poured.
A common pattern: homeowners finalize the countertop footprint first, then discover the grill's rear clearance pushes the whole run 6 inches forward, throwing off the aisle width on the opposite side. Sequence clearances before finishes, not after.
Measure your grill's actual countertop depth and rear clearance before finalizing cabinet runs. Built-in grills need more clearance behind them than freestanding models, and discovering this after the slab is poured means expensive rework.
Outdoor Kitchen Utility Placement: Gas, Water, Electric, Drainage
Outdoor kitchen utility placement is where most projects get complicated, because gas, water, electricity, and drainage all have to be routed before the slab is poured. Getting the sequence wrong means breaking concrete later, and concrete doesn't come apart cheaply.
Sequence the trench before anything else
The order of operations that avoids rework:
- Finalize appliance locations on a scaled plan. Every utility stub-out is driven by where the appliance sits.
- Confirm gas meter capacity. Most residential meters are sized for the house's existing load plus a margin. Adding a high-BTU grill, side burner, and outdoor fireplace can exceed that margin. A common pattern is a 75,000 to 100,000 BTU grill plus a 30,000 BTU side burner; check the meter's rated capacity and consult your gas utility before committing.
- Design the trench to carry gas, water, electrical conduit, and drainage in one pass, keeping gas and electrical in separate conduits per code.
- Run rough-ins and leave them exposed for inspection.
- Pass inspection, then pour the slab or close up walls.
- Set appliances and make final connections after finishes are in.
Gas
Gas line sizing depends on distance and total BTU load. A long run to a distant island may require a larger-diameter line to maintain pressure. Your licensed gas fitter will size the line using the appliance's input rating and run length. Flexible connectors are for final hookup only, the buried run should be rigid pipe.
Water and drainage
If you're adding a sink, plan both supply and drain. Supply is straightforward; drainage is harder. Options include:
- Tie into the home's sanitary sewer where slope allows (typically requires a 1/4-inch-per-foot fall).
- Dry well or French drain for gray water where local code permits, check first, because many jurisdictions restrict what can go into a dry well.
- Holding tank with pump for locations where gravity drainage isn't possible.
Electrical
Outdoor kitchens typically need:
- Dedicated circuits for the refrigerator, grill ignition, and any high-draw appliance. Don't share a circuit with interior loads.
- GFCI protection on all outdoor receptacles, per National Electrical Code (NEC) requirements for wet and damp locations.
- Weather-rated boxes and covers on every outlet, even under a roof.
- Conduit for future runs, pull a spare conduit to the island now; it costs little during the trench and saves a tear-out later.
Permits and inspections
Most jurisdictions require a building permit for gas and electrical work, and many require one for any structure with a foundation. Check with your local building department before you dig. Utility rough-ins must be inspected before you close up walls or pour the slab, so schedule inspections into your timeline.
Skipping the permit to save time can backfire badly. Unpermitted gas and electrical work can fail a future home inspection, complicate a sale, and void your homeowner's insurance coverage on the structure.
The single most expensive mistake in outdoor kitchen utility planning is pouring the slab before the trench is inspected. Everything else is recoverable; that one isn't.
Countertops, Cabinetry, and Weather-Resistant Materials
Material durability decides whether your kitchen looks new in five years or tired in two, so it is worth slowing down here.
The single upgrade that most improves long-term durability is spending more on the cabinet frame and less on decorative finishes. Frames fail first, and a failed frame takes the countertop with it.
Climate, Winterization, and Smart Integration
Climate-specific design is the angle most planning guides skip, yet it changes your material and layout choices from the start. In hot, sunny regions, shade structures and a pergola over the cooking zone keep the cook comfortable and slow UV damage. In cold or wet climates, covered roofs, drainage slope away from the foundation, and freeze protection on water lines matter more than countertop aesthetics.
- Shut off and drain water lines to sinks and refrigerators
- Disconnect and store portable appliances
- Cover the grill and any exposed cabinetry
- Inspect seals and caulk lines for cracks
DIY vs. Professional Installation: A Decision Framework
Gas and electrical work is not a DIY project for most homeowners. Use this framework to decide what you can handle yourself and what you should hand off:
| Task | DIY-Friendly? | Why |
|---|---|---|
| Site survey and measuring | Yes | No special tools or permits |
| Layout planning and design | Yes | Research and planning work |
| Assembly of modular components | Often yes | Follow manufacturer instructions |
| Gas line connection | No | Licensed work, permit required |
| Electrical rough-in | No | Licensed work, GFCI and code requirements |
| Drainage and foundation slab | Rarely | Structural and code implications |
Frequently Asked Questions
What is the best layout for an outdoor kitchen?
The best outdoor kitchen layout depends on your patio size and how you cook. An L-shape works well for medium patios because it separates the cooking zone from the prep area. A linear layout suits narrow spaces, while a U-shape gives the most counter space if you have the room. The key is keeping your outdoor kitchen layout anchored by the kitchen triangle: grill, prep area, and serving station within a few steps of each other.
How much space do you need for an outdoor kitchen?
Most built-in outdoor kitchens need at least 8 feet of linear counter space, with 24 to 30 inches of countertop depth for prep and appliance clearance. Add a minimum of 36 inches of walkway behind seating and 42 inches in front of the grill for safe movement. If you plan to include a refrigerator, sink, and storage, budget closer to 12 to 15 feet of total run so nothing feels cramped.
What are the three zones of an outdoor kitchen?
Outdoor kitchen zone planning breaks the space into three working areas: the prep area for chopping and staging food, the cooking zone built around the grill or smoker, and the serving station for plating and drinks. Keeping these zones distinct but close together creates an ergonomic workflow, so you are not walking back and forth across the patio while hosting guests or managing a hot grill.
Do I need a permit for an outdoor kitchen?
In most U.S. jurisdictions, a built-in outdoor kitchen with a gas line, electrical connections, or a permanent foundation slab requires a building permit. Check with your local building department before construction. Freestanding grills and modular components often fall outside permit rules, but hardscaping, utility rough-ins, and fire features typically need approval. Getting the permit upfront avoids fines and problems when you sell the home.


