

Table of Contents
- Planning Your Outdoor Kitchen Gas Line Layout
- Outdoor Kitchen Gas Line Sizing: BTU Demand and Pipe Diameter
- Natural Gas vs Propane for Outdoor Kitchen: Choosing Your Fuel Source
- How to Run a Gas Line to an Outdoor Kitchen
- Installing an Outdoor Kitchen Gas Shutoff Valve
- Permits, Inspections, and Local Code Compliance
- Common Mistakes to Avoid
- Frequently Asked Questions
Last Updated: October 12, 2026
Planning Your Outdoor Kitchen Gas Line Layout
A well-planned outdoor kitchen gas line is the foundation of a safe, functional cooking space.
Locate your gas meter and main shutoff valve, then walk the path to your planned outdoor kitchen.

Next, choose your route. Running gas along the side of your house is simpler than burying it under a patio. Buried lines need trenches and protective conduit; exposed lines must be secured and shielded from damage.
Outdoor Kitchen Gas Line Sizing: BTU Demand and Pipe Diameter
Gas line sizing is not guesswork. It depends on two variables together: appliance demand (BTU per hour) and line length. Guides that give one number and stop are where undersized lines come from.
Calculating BTU Load Across Multiple Appliances
Add up the BTU rating of every appliance on the line, checking manufacturer specifications.
For example:
- Main grill: 60,000 BTU
- Side burner: 15,000 BTU
- Pizza oven: 40,000 BTU
- Total: 115,000 BTU
This total is your design load. Size the pipe for the total, not the grill alone, and include any burner or patio heater you might add later, resizing a buried line means re-trenching.
Pressure Drop and Line Length Considerations
The longer your gas line, the more pressure you lose along the way, so long runs need larger pipes to compensate.
Natural gas systems typically run at 7 inches of water column pressure; propane at 11 inches. Pressure drop is measured in inches of water column per 100 feet of pipe. If a line is too small or too long, pressure falls below what appliances need to ignite and burn properly.
A Worked Sizing Walkthrough
Here is the pattern most gas practitioners follow, the same logic an inspector checks against.
Step 1, Total your load. Using the example above, your design load is 115,000 BTU/hr.
Step 2, Measure the run. Measure from the meter or propane regulator to the farthest appliance along the actual pipe path, not straight-line distance.
Step 4, Round up, never down. If your load and length fall between two pipe sizes, choose the larger one.
Most outdoor kitchens stay within 50 feet of the house, where a ¾-inch line works for many residential applications in the 100,000-200,000 BTU range. Farther away or with a higher total load, you may need 1-inch. The table, not distance alone, makes the call. Proper pipe sizing remains a critical step that must be coordinated with the broader phases of outdoor kitchen construction to ensure that infrastructure needs are met before the final finishes are applied.
Natural Gas vs Propane for Outdoor Kitchen: Choosing Your Fuel Source
Your choice between natural gas and propane shapes everything else.
Natural gas is cheaper per unit and never needs refilling, but your outdoor kitchen is fixed to your home.
Propane gives you flexibility, place your grill anywhere in the yard, since the tank is portable.
For most outdoor kitchens, natural gas makes sense if your home already has a gas line; without service, propane is your default.
How to Run a Gas Line to an Outdoor Kitchen
This is where planning becomes action. Follow these steps in order.
Step 1: Verify Your Gas Supply Capacity
Before running a single foot of pipe, call your gas utility to confirm your meter has capacity for additional appliances. Some older homes have small meters that can't handle outdoor kitchen demand.
Your utility will confirm the meter size, current capacity, and whether the system supports your planned BTU load, a 10-minute call that prevents major problems later.
If your meter is undersized, an upgrade is a utility job, not DIY. Plan for that cost.
Step 2: Choose Your Routing Path (Buried or Exposed)
Decide now: will your line run above ground or underground?
Buried lines stay hidden but require a trench, protective conduit, and careful depth, local codes typically require 12-18 inches of cover. Digging is labor-intensive.
Exposed lines run along your house, fence, or patio edge, visible but easier to install and inspect. Secure them with brackets every 3 feet and protect them from damage.
Most homeowners choose exposed lines for a first outdoor kitchen: faster, cheaper, and easier to modify later.
Step 3: Select Compatible Pipe and Fittings
Pipe material matters. Three main options: rigid black iron pipe, CSST (corrugated stainless steel tubing), or flexible connectors.
Black iron is durable but requires threading and is harder to install. CSST is flexible and easier to route.
At Urban Man Caves, we recommend the FLEX LINE KIT, MERCURY IGNITION, FOR OVER 250K BTU for high-output systems.
FLEX LINE KIT, MERCURY IGNITION, FOR OVER 250K BTU →

All fittings must be rated for gas service. Do not use water pipe fittings or air line fittings. They will leak or fail.
Step 4: Seal Threaded Connections Properly
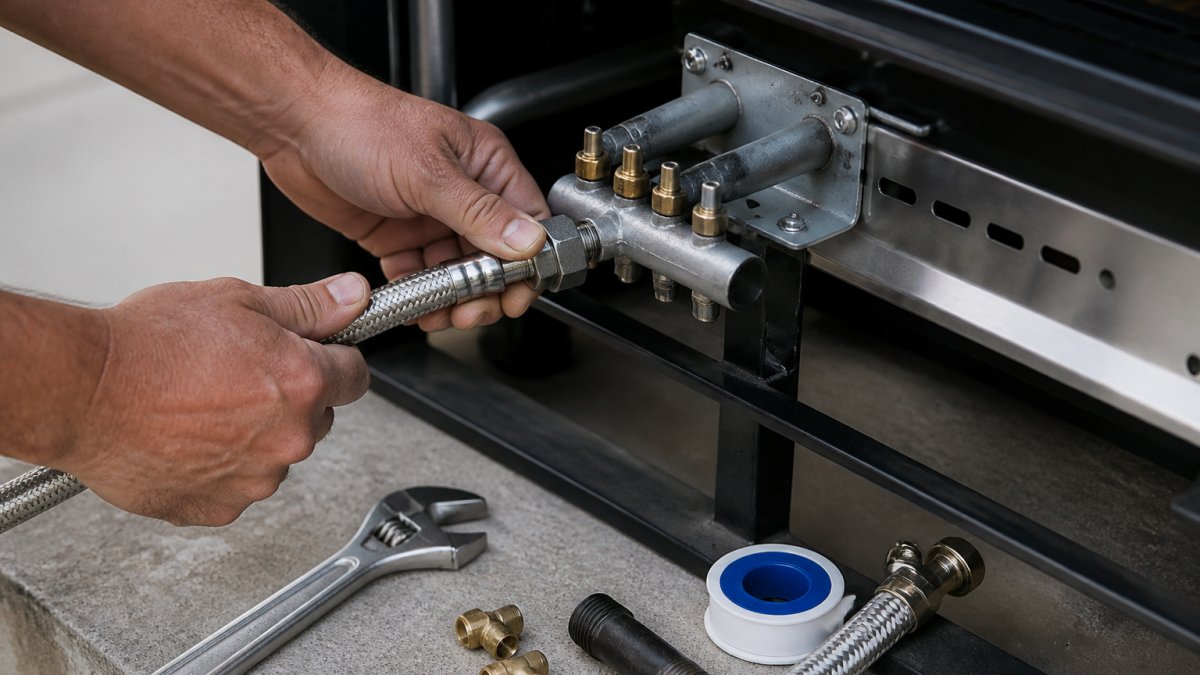
This step prevents leaks. Use pipe dope or thread sealant tape on every threaded connection: pipe dope is a paste applied to the male threads, while thread sealant tape (PTFE) wraps around them.
Apply pipe dope to the male threads, wrap tightly three times, then hand-tighten the fitting and use a wrench for the final quarter turn. Over-tightening strips threads and causes leaks.
Step 5: Connect Your Grill or Appliance
The final connection to your grill uses a flexible connector or quick-disconnect fitting. Quick-disconnects let you remove your grill without cutting pipe.
For propane systems, the CON KIT LP UNIT ONLY provides a complete 36-inch connector with a low-pressure regulator. It arrives fully assembled with all adapters needed to connect a standard propane cylinder to your cooker inlet.
Tighten by hand first, then use a wrench for a final quarter turn. Do not over-tighten.
Step 6: Test for Leaks Before First Use
This is mandatory. Mix soapy water in a spray bottle. Spray every connection: at the meter, along the line, at the appliance. Bubbles mean a leak.
If bubbles appear, tighten slightly and spray again. If they persist, disconnect the fitting, reapply pipe dope, and reconnect.
Do not light your grill until every connection passes the soapy water test. A gas leak is a serious hazard.
Installing an Outdoor Kitchen Gas Shutoff Valve
A shutoff valve lets you stop gas flow without calling your utility. Install one as close as possible to your outdoor kitchen.
Your shutoff valve should be accessible and clearly marked. Use the LINE VALVE KEY, 9" to operate buried shutoff valves safely. This precision-engineered wrench prevents damage to sensitive fittings and eliminates slippage that can cause cross-threading or manifold leaks.

Test your shutoff valve monthly by turning it off and on. A stuck valve is useless in an emergency.
Permits, Inspections, and Local Code Compliance
Do not skip this. Gas work requires permits in most jurisdictions, but the rules, who may do the work, allowed materials, burial depth, and testing, vary by jurisdiction. There is no single national answer.
A Checklist for Confirming Your Local Requirements
Work through these questions with your local building department before you buy materials or dig:
- Is a permit required for a residential gas line to an outdoor appliance? In most jurisdictions, yes. Ask what it covers and what it costs.
- Who is allowed to do the work? Some jurisdictions require a licensed gas fitter or plumber for any gas piping. Others allow a homeowner to pull an owner-builder permit and do the work themselves, subject to inspection. Get the answer in writing if you can.
- What pipe materials are approved? Black iron, CSST, and copper are treated differently across codes; some jurisdictions restrict CSST or require specific bonding and grounding. Confirm before you buy.
- What burial depth and protection are required for a buried line? Many codes require minimum cover depth plus protection where the line crosses a driveway or is subject to digging. Ask for your number.
- What test pressure and duration does the inspector require? A pressure test differs from a soapy-water leak check: inspectors commonly require the line to hold a specified pressure for a specified time with a gauge in place. Ask for the exact figure.
- When must the inspection happen? Most jurisdictions require inspection after installation and pressure-testing but before burial or appliance connection. Burying first can mean digging it back up.
- Are there appliance-specific rules? Some jurisdictions have separate requirements for outdoor cooking appliances, side burners, and patio heaters.
How the Inspection Typically Sequences
A common sequence:
- Permit application and approval. Submit your plan, appliance BTU ratings, and proposed route. Approval takes days to a few weeks depending on jurisdiction.
- Rough-in inspection. The line is installed and pressure-tested, but not yet buried or connected. The inspector verifies pipe size, material, support spacing, and test results.
- Final inspection. After the appliance is connected and the line is in service, the inspector confirms the connection, shutoff valve location, and that the system holds pressure.
Plan for several weeks from application to final sign-off. Rushing creates code violations and safety hazards, and a failed inspection means rework.
Why the Permit Matters Beyond the Inspection
An unpermitted gas line can surface during a home sale, insurance claim, or remodel. Inspectors may require removal or code upgrades, and correcting it later almost always costs more than doing it right the first time.
Common Mistakes to Avoid
Undersizing your pipe is the most common error.
Skipping the leak test is dangerous. Soapy water costs nothing. A gas leak costs lives.
Using the wrong sealant causes leaks.
Burying a line without proper conduit invites damage.
Not getting a permit creates problems when you sell.
A properly installed outdoor kitchen gas line is the backbone of a reliable outdoor cooking space.
Urban Man Caves provides the components you need to complete your installation safely.
Frequently Asked Questions
Can I install an outdoor kitchen gas line myself?
Most jurisdictions require a licensed plumber or gas technician to handle outdoor kitchen gas line installation. DIY work on gas lines violates local codes and voids insurance. You can handle non-pressurized prep work like trenching and routing, but final connection, pressure testing, and inspection must be performed by a licensed professional. Check your local building department for specific requirements before starting any work.
What size gas line does an outdoor kitchen need?
Gas line size depends on your total BTU demand and the distance from your supply. A typical outdoor kitchen with a single grill (30,000-60,000 BTU) uses ½-inch or ¾-inch pipe. Multiple appliances (grill plus side burner, patio heater, or pizza oven) may require ¾-inch or 1-inch lines. Pressure drop increases with distance; longer runs need larger diameter pipe. A licensed technician should calculate your specific load and sizing using local code tables.
Should I use natural gas or propane for an outdoor kitchen?
Natural gas offers unlimited supply via a fixed line from your meter, lower per-BTU cost, and no tank replacement. Propane requires a separate cylinder but offers more flexibility for grill placement and doesn't depend on utility infrastructure. Natural gas is ideal for built-in kitchens; propane suits portable setups. Your choice depends on existing utility service, budget, and whether you want a permanent or movable installation. Consult your local gas utility for natural gas availability and line capacity.
How do you test an outdoor gas line for leaks?
After installation, a licensed technician performs a pressure test using specialized gauges to detect any drop in system pressure over time. For visual inspection, apply soapy water to all threaded connections and fittings; bubbles indicate a leak. Never use flame to test for leaks. A static pressure decay test is mandatory before first ignition to ensure zero-leak integrity. If you suspect a leak during operation, turn off the gas supply immediately and contact a licensed technician.


