

Last Updated: October 30, 2026
Quick Summary
Design an outdoor kitchen with a side burner by planning a three-zone prep, cook, and serve workflow, then placing the side burner on the same counter run as the grill. Keep standard counters 36 inches high and 24 to 30 inches deep, and follow the manufacturer's clearance to combustibles.
- Plan at least 12 to 15 inches of counter on each side of the burner for landing hot pots and lids.
- Natural gas suits homes with an existing gas line, while propane fits patios without a connection or movable kitchens.
- A power burner beats a standard side burner for wok cooking, rapid boiling, and high-heat searing.
- Sequence the build from fuel type and gas line sizing through electrical rough-in, ventilation, framing, and cutout.
- Look for 304-grade stainless steel on the burner body and grates for rust and heat resistance.
Table of Contents
- Start With a Layout That Puts the Side Burner to Work
- Outdoor Kitchen Dimensions and Clearances You Cannot Skip
- Natural Gas vs Propane Side Burner: Which Fuel Fits Your Patio
- When a Power Burner for Your Outdoor Kitchen Beats a Standard Side Burner
- Plan the Gas Line, Electrical, and Ventilation Before You Build
- Choose Materials and Weather Protection That Last
- Budget the Build and Pick Your Side Burner
- Frequently Asked Questions
Start With a Layout That Puts the Side Burner to Work
Designing an outdoor kitchen with a side burner starts with a simple question: where will you actually stand when you use it? A side burner is a cooktop, not a decoration.
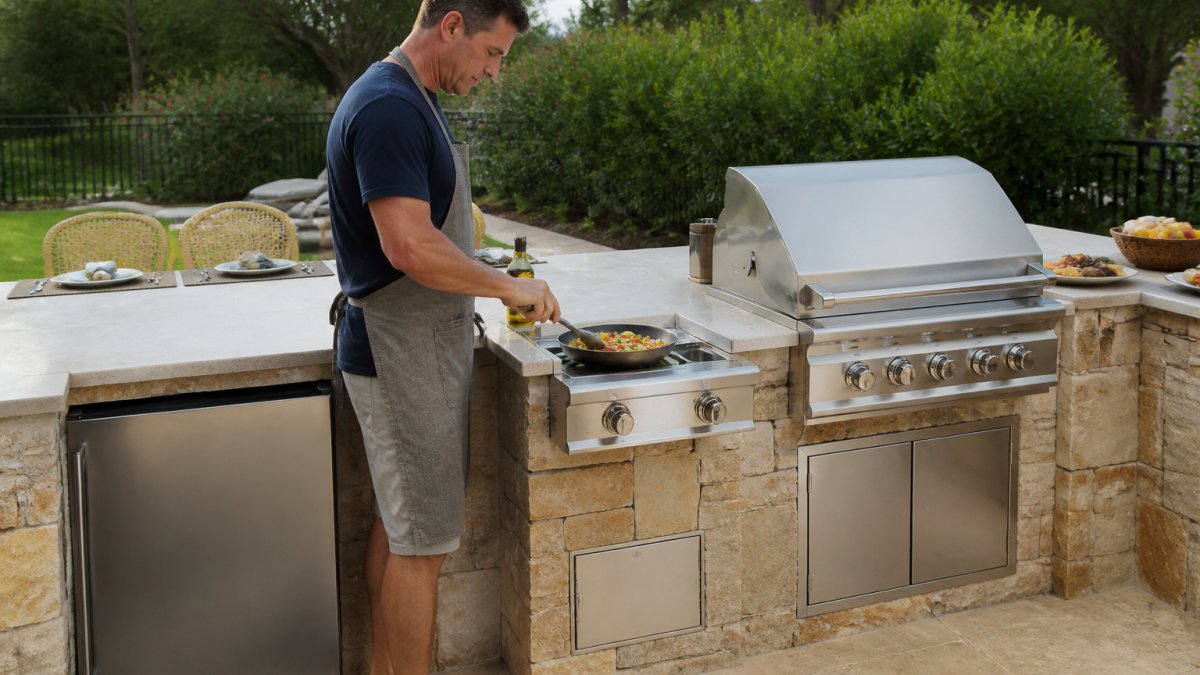
The Three-Zone Workflow: Prep, Cook, Serve
Good outdoor kitchens follow the same logic as indoor ones. You move food through three zones: prep, cook, serve. Put them in a straight line or a gentle L, and keep each zone within a step or two of the next.
- Prep zone: counter space for chopping, mixing, and staging ingredients
- Cook zone: your grill plus the side burner, side by side
- Serve zone: landing space for plated food, near the seating area
Keep the side burner on the same run of counter as the grill. If your space allows a step-by-step plan, our guide on how to plan an outdoor kitchen layout walks through the full sequence.
Small Outdoor Kitchen Ideas That Still Fit a Burner
A tight patio does not rule out a side burner. It rules out wasted space. A few layouts that work: Best Outdoor Kitchen Layouts for Small Patios
- Straight run: grill, burner, and a short prep counter against one wall
- L-shape: grill on the long leg, burner on the short leg, prep in the corner
- Peninsula: a freestanding island that doubles as a serving bar
Outdoor Kitchen Dimensions and Clearances You Cannot Skip
Dimensions are where a side burner design succeeds or fails. Get the counter height and depth right, then give the burner the breathing room its manufacturer requires, and treat those clearances as hard limits, not suggestions.
Counter Height, Depth, and Burner Cutout
Standard outdoor kitchen counter height is 36 inches, which matches indoor kitchen ergonomics and keeps pots at a comfortable lifting height. Properly integrating these appliances into your workspace ensures that you have the room required to organize your essential outdoor cooking tools while preparing ingredients for the grill.
Plan at least 12 to 15 inches of counter on each side of the burner for landing a hot pot, a lid, or a plated dish. A burner jammed against a side wall forces you to reach across the flame, which is both awkward and unsafe.
Heat Clearance From Walls, Overhead Structures, and Combustibles
A side burner throws heat sideways and up, not just straight down. That changes the clearance math compared with a grill.
- Side walls and tall cabinets: keep the burner body at the manufacturer's stated distance from any vertical surface. If the spec sheet calls for 6 inches to combustibles, do not shave it to 4 because the island looks better.
- Overhead structures: a pergola, roof overhang, or upper cabinet above the burner needs clearance per the spec sheet. Rising heat and grease-laden air will stain and eventually compromise wood overhead.
- Combustible countertops and framing: wood countertops, wood framing, and siding are the classic DIY failure point. Add a non-combustible liner or metal heat shield around the cutout when the island frame is wood, and never let the burner body sit directly against bare framing.
Ergonomics Around the Burner
Clearance is also about your body. The burner should sit at the same counter height as the grill so you are not stooping or reaching up. Keep the burner on the same run of counter as the grill and prep area, with the landing space on the side you naturally use. If you are right-handed, a burner placed to the right of the grill with landing space to its right lets you stir, set the spoon down, and plate without crossing the flame.
Natural Gas vs Propane Side Burner: Which Fuel Fits Your Patio
Natural gas wins for most homeowners who already have a gas line at the house. You never refill a tank, and the flame runs as long as you need it.
- Natural gas: plumbed to the house, no tanks, steady supply
- Propane: tank-fed, flexible placement, needs refills and venting
If you go propane, plan where the tank lives before you build. A concealed enclosure keeps the tank out of sight and protects it from weather. Our ideas for a concealed propane tank enclosure cover the options.
When a Power Burner for Your Outdoor Kitchen Beats a Standard Side Burner
A power burner for your outdoor kitchen is worth the upgrade if you cook with a wok, boil large pots, or sear at high heat. Standard side burners handle simmering, sautéing, and warming.
Here is how the two compare in practice:
| Feature | Standard Side Burner | Power Burner |
|---|---|---|
| Best for | Simmering, sauces, warming | Wok cooking, rapid boiling, searing |
| Heat output | Moderate | High |
| Pot size | Small to medium | Large, including woks |
| Fuel options | Propane or natural gas | Often natural gas |
| Price range | Lower | Higher |
Plan the Gas Line, Electrical, and Ventilation Before You Build
Utilities are the part of an outdoor kitchen you cannot easily change later. Once the countertop is set and the island is clad, moving a gas line or adding a circuit means demolition. Plan all three, gas, electrical, and ventilation, as one coordinated package before framing begins.
Blaze Built-In Premium LTE Double Side Burner with Lights →
Gas Supply: Fuel Type, Line Sizing, and Shutoff Access
Decide natural gas versus propane first, because it drives everything downstream.
- Natural gas: plumbed from the house meter. The line must be sized for the total connected load, grill plus side burner plus any other gas appliance, not just the burner alone. An undersized line shows up as a weak flame when the grill and burner run at the same time.
- Propane: tank-fed. Plan the tank location, the route to the island, and how you will swap or refill the tank without dragging it through the cooking zone. A concealed enclosure keeps the tank out of sight and protected from weather.
Put a shutoff valve where you can reach it without moving the grill, the burner, or a drawer stack. A common pattern is a shutoff at the island, accessible from the front, plus the main shutoff at the meter or tank. Label it.
Electrical: Ignition, Lighting, and Outlets
If the burner has electronic ignition, lights, or a rotisserie motor nearby, run electrical to the island. Plan for:
- A dedicated circuit for ignition and lighting, sized per the appliance's rating
- GFCI protection for outdoor receptacles
- Outlets placed where a blender, a probe thermometer, or a phone charger can reach without a cord crossing a burner
Run conduit before the countertop goes on. Adding a circuit to a finished island is far more expensive than roughing it in.
Ventilation and Airflow
Gas appliances need airflow. An enclosed island can trap heat and combustion byproducts, so plan vents in the cabinet walls and keep the burner's air intake clear. Outdoor Kitchen Ventilation Requirements Do not seal a propane tank enclosure airtight, propane is heavier than air and needs low-level ventilation. Overhead, a pergola or roof over the cook zone needs enough clearance per the appliance spec so heat and grease do not collect.
When to Bring In a Licensed Professional
Gas line work and electrical work typically require a licensed professional. A licensed plumber or gas fitter should size and run the gas line and set the shutoff; a licensed electrician should handle the circuit, GFCI protection, and any permit-required work. Check with your local building authority about required permits before construction. The inspection is cheaper than redoing a buried line.
Choose Materials and Weather Protection That Last
Stainless steel resists rust and handles heat. Look for 304-grade stainless on the burner body and grates. For countertops, stone and composite hold up better than wood outdoors.
- Burner and grill: 304 stainless steel
- Countertop: stone, tile, or composite
- Frame: steel or masonry, not bare wood
- Covers: use them when the kitchen sits idle
A removable cover protects the burner from debris and weather between cooks. Use it. It is the cheapest maintenance you will ever do.
Budget the Build and Pick Your Side Burner
Set your budget around three buckets: structure, appliances, and finishes. Appliances are the easiest place to overspend or underspend. Match the burner to how you actually cook, then spend the rest on the island and counter.
Here are three burners to consider:
- Blaze Built-In Premium LTE Double Side Burner with Lights ($729): two 12,000 BTU brass burners, stainless construction, illuminated knobs, and a lifetime warranty on the burner, grate, body, lid, and valve.
- Bull Single Slide-in Pro Side Burner ($899): 25,000 BTUs on natural gas, 304 stainless, and a wok-friendly ring for stable stir-frying.
- Bull Slide-in Double Side Burner ($929): 22,000 BTUs across two brass burners, in propane or natural gas, with solid stainless grates.
When you are ready to choose, you can shop the Blaze double side burner and compare it against the Bull options side by side.

Frequently Asked Questions
Where should a side burner go in an outdoor kitchen?
Place the side burner beside the main grill but outside its primary heat zone, ideally on the side where you naturally set down pans. Keep it within arm's reach of a prep area so you can move ingredients straight from the counter to the flame. Leave landing space on at least one side for hot cookware, and check the manufacturer's cutout and clearance specs before you cut the countertop.
Should an outdoor kitchen side burner use natural gas or propane?
Natural gas saves you from refilling tanks and suits a burner that runs often, but it requires a permanent gas line and a shutoff valve installed to local code. Propane is simpler for patios without a gas connection and lets you move the island later. Match the burner to your main grill's fuel so both run from one supply, and confirm the unit is rated for that fuel type.
Is a power burner different from a standard side burner?
A standard side burner typically runs around 12,000 BTUs per burner and handles simmering, sautéing, and warming. A power burner pushes much higher output, often 25,000 BTUs or more, so it boils large pots fast and supports wok cooking. If you regularly cook for crowds or want restaurant-style heat, a power burner for an outdoor kitchen is worth the upgrade.
How much space do you need for an outdoor kitchen side burner?
Plan for the unit's cutout dimensions plus several inches of counter on each side for landing hot pans. Check the cutout dimensions in each product's spec sheet before cutting the countertop. Add clearance from combustible materials per the manual, and leave room for the cover to open fully without hitting the grill lid.
Designing an outdoor kitchen with a side burner comes down to workflow, clearances, and fuel. Get those right and the cooking takes care of itself. Urban Man Caves carries a curated lineup of built-in grills, side burners, and outdoor refrigeration, backed by personal expert support and free shipping on orders over $50 in the lower 48 states. Get started with Urban Man Caves and build a patio kitchen you will use all season.


