

Saturday night arrives, eight guests walk through the back door, and the grill is already hot. You're standing behind a searing cooking surface with a tray of food in one hand, while the bar sits across the patio and every drink request sends someone through the same narrow route. Guests cross behind you, the person carrying ice bumps the prep counter, and the cook ends up managing traffic instead of dinner.
That failure usually has nothing to do with the grill or the countertop. An outdoor bar with grill succeeds when cooking, serving, and socializing follow a clean workflow. The finishes matter, but the decisions about circulation, utilities, ventilation, and appliance placement happen first.
Table of Contents
- Why the Bar and Grill Belong in the Same Conversation
- Planning the Layout Before You Pour a Single Footing
- Choosing Materials That Survive Heat, Weather, and Spilled Cocktails
- Clearances, Ventilation, and Utility Runs You Cannot Skip
- Designing the Bar Zone to Actually Serve a Crowd
- Build Order From Footing to First Cookout
- Maintenance, Seasonal Care, and Year-One Checkpoints
Why the Bar and Grill Belong in the Same Conversation
A grill and a bar can both look excellent in isolation and still work badly together. The common mistake is to place the grill wherever the utility connection is easiest, then add bar seating wherever the patio has leftover space. During a real gathering, those two decisions create crossing paths between the hot zone, the drink station, and the guests.
The better arrangement treats the grill and bar as connected stations. The cook needs a protected prep surface beside the appliance, a short route to the serving counter, and enough separation from people moving toward drinks. Guests need a social edge where they can talk to the cook without standing directly over the flame. The bar should support that interaction without becoming a queue in front of the grill.
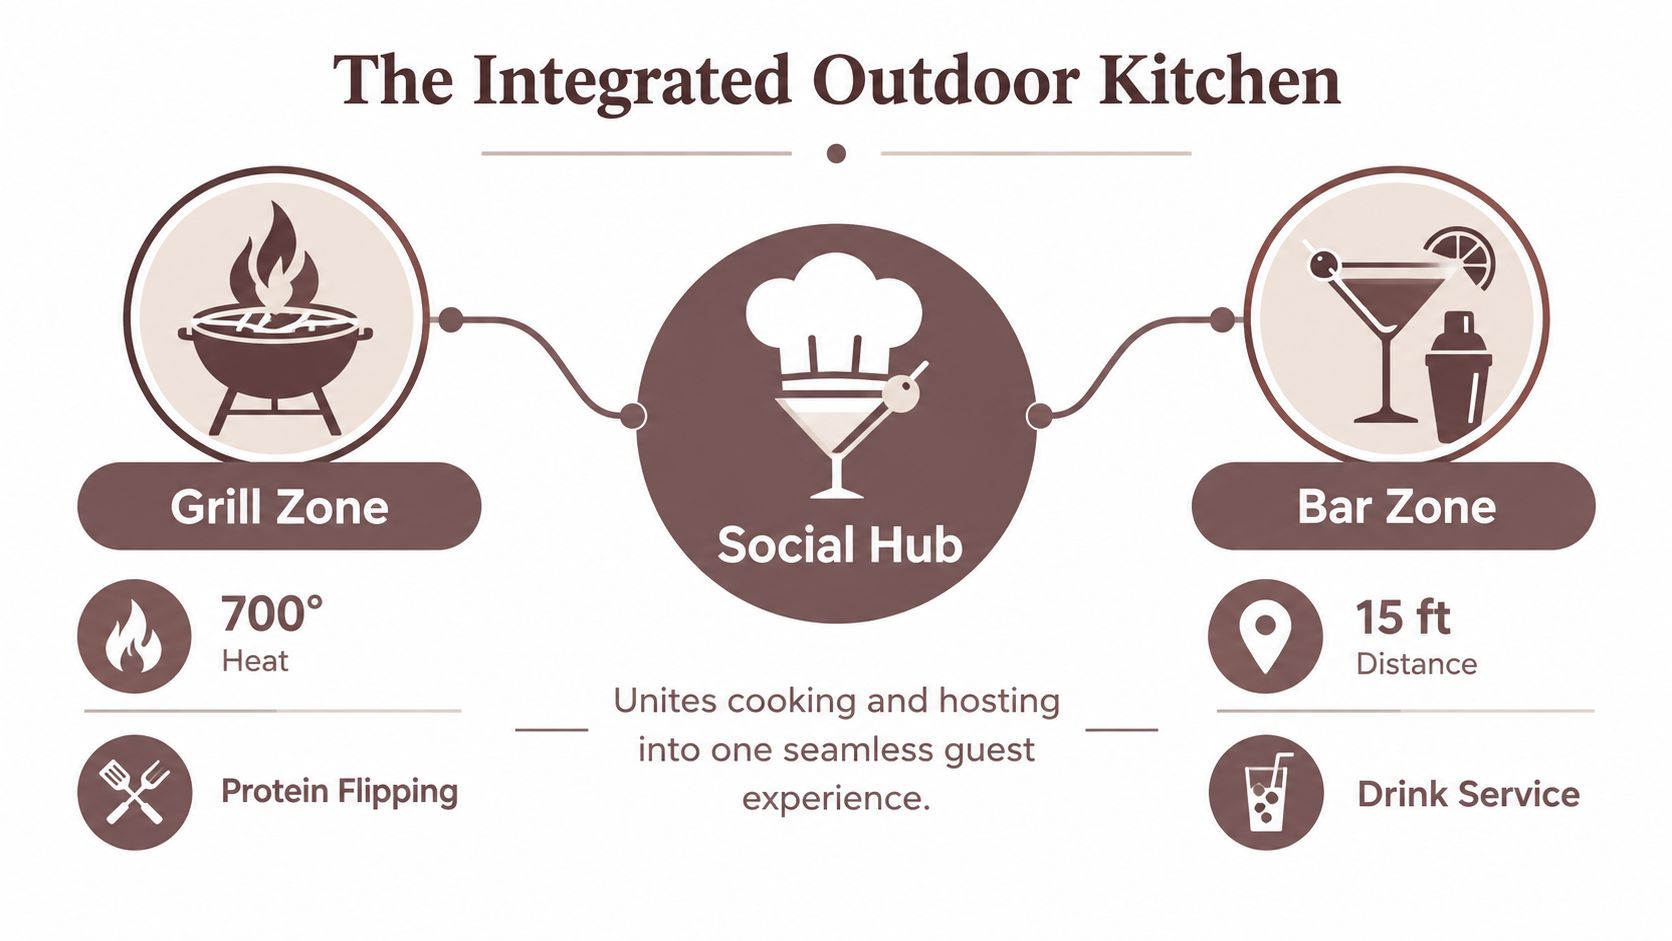
The party exposes weak planning
Consider a straight island with the grill at one end and drinks at the other. It may look efficient from above, but the bartender still needs access to ice, glassware, and waste storage, while the cook needs a landing area for raw ingredients and finished food. If those functions share the same counter, hands and bodies compete for the same few feet.
A stronger setup gives the cook a rear or side work surface and directs finished plates toward a defined pass. The bar faces the guest side, while lounge seating stays outside the busiest service route. This is the difference between a grill next to a bar and an integrated hosting space.
Practical rule: Guests should be able to order a drink, sit down, and leave the bar without crossing the cook's working line.
The market context supports treating this as a serious outdoor-living category, not a decorative add-on. Grand View Research's outdoor kitchen market overview estimates the global market at USD 26.35 billion in 2025 and projects USD 52.75 billion by 2033, with a projected 9.1% CAGR from 2026 to 2033. In the United States, the estimate is USD 9.72 billion in 2025, rising to a projected USD 18.22 billion by 2033, with cooking fixtures identified as the largest product segment.
That growth reflects a practical shift toward built-in grills, refrigeration, storage, and entertaining layouts. If you're planning seating, drink service, and cooking as one system, the outdoor kitchen with bar seating guide is a useful reference for thinking beyond a row of stools.
Planning the Layout Before You Pour a Single Footing
Start at the property line, not with a catalog. Visit the proposed location at the time you normally entertain and observe where the sun lands, which way smoke moves, what guests do when they leave the house, and where neighbors can see the activity. A beautiful island in the wrong wind direction will push smoke toward faces, doors, or windows.
The bar should usually sit at a natural pause point between the house and lounge area. The grill can remain close enough for conversation, but it shouldn't face the main walkway if opening a hot lid will put the cook in the path of every arriving guest.
Draw the traffic before the footprint
For a medium-size hosting setup, an L-shaped or U-shaped footprint can give the grill, prep surface, and bar distinct jobs without forcing guests through the cooking line. The exact size depends on appliances and local conditions, so stake the corners with marking paint before ordering stone or excavating.
Use the following as planning targets from the layout brief, then verify them against your property and local requirements:
- Cook walkway: Preserve a working route behind the cook rather than trapping the operator against a wall.
- Guest standoff: Keep bar users far enough from the hot side that stools and elbows don't interfere with lid openings or serving.
- Ember zone: Maintain the specified ember-safe area on the grill side, especially near outdoor fabrics, fencing, and planting.
- Overhead protection: Check the planned roof or pergola against the appliance manual and combustible-surface clearances before construction.
- Door swing: Mark refrigerator, trash, and storage doors on the ground. A door that opens into the main path will cause trouble every evening.

Choose the pattern that matches the property
A straight island works well on a narrow patio. Put the grill toward one end, prep and wet functions in the center, and bar service toward the social end. The drawback is that every function shares one linear counter, so appliance order matters.
An L-shape gives the cook a short leg and lets the longer leg become prep, storage, and serving space. It handles corner patios efficiently, but the inside corner needs careful planning so it doesn't become a dead spot.
A U-shape offers the strongest separation between cooking and guest interaction. A full cook wall can face a raised bar peninsula, although the footprint can feel enclosed and may require more attention to ventilation and escape routes.
Before concrete work, review the base and patio relationship with a resource such as this PA concrete patio guide from Firm Foundations. It can help organize early slab and patio calculations, but it doesn't replace a structural review or local code confirmation. For more circulation examples, the outdoor kitchen layout guide focuses on keeping work and guest movement from colliding.
Choosing Materials That Survive Heat, Weather, and Spilled Cocktails
A Friday gathering exposes weak material choices quickly. Grease reaches the cabinet fronts, citrus spills across the bar, and guests set hot pans wherever space is available. Freeze-thaw movement, ultraviolet exposure, and standing water add further stress. Treat the frame, cladding, cabinets, and countertop as separate decisions, rather than choosing one material for the entire outdoor bar with grill.
A masonry frame with veneer or stucco suits many installations because it provides predictable structure and allows damaged finish sections to be repaired independently. Full-thickness natural stone, including granite and quartzite, handles heat and weather well, though its weight can call for a more substantial footing. Review this outdoor kitchen materials guide while comparing heat resistance, repairability, drainage, and maintenance.
Compare the island materials
| Material | Heat Tolerance | Maintenance | Cost Tier |
|---|---|---|---|
| Natural stone | High when specified around the appliance | Periodic sealing may be required | High |
| Brick | High and visually forgiving | Repointing and cleaning over time | Medium to high |
| Stainless steel | High for properly rated outdoor cabinetry | Clean regularly, especially near saltwater | Medium to high |
| Concrete block with veneer or stucco | High when built and finished correctly | Repair finish sections as needed | Medium |
| Tile | Depends on substrate and installation | Grout cleaning and repair | Low to medium |
Stainless cabinetry performs well outdoors only when its specification matches the site. 304 or 316 stainless steel with formed edges withstands exposure differently from thin bargain cabinetry, particularly beside a saltwater pool. Confirm how the box is constructed, where water drains, and whether hinges and fasteners are rated for exterior use. Cabinet placement also matters. A door that opens into the cook's route creates a workflow problem even if the material survives for years.
Countertops involve different compromises. Poured concrete tolerates hot cookware and drink spills when its sealer is maintained. Dense porcelain can provide a stone-like finish with less sealing demand, but installers must detail its edges and support structure correctly. Tile can reduce upfront cost and suit a patterned design, yet grout requires cleaning and repair. Rigid substrates and moving assemblies can also create cracks.
Match the finish to the appliance
The grill manufacturer's installation manual governs the relationship between the appliance and adjacent surfaces. A countertop that handles ordinary weather may still fail beside a grill if the enclosure misses its rated clearance or support requirements.
Stone facing does not make combustible backing safe. Wood sheathing must stay outside the grill's prohibited zone, even when veneer covers it. Select finishes for the full installation, including the frame behind them, the cabinet ventilation, and the cleaning routine after a crowded cookout. A durable bar is one that remains serviceable when heat, weather, and daily traffic work against it.
Clearances, Ventilation, and Utility Runs You Cannot Skip
The wall behind a grill is a controlled hazard zone. Its surface type, the appliance manual, the roof above, and local code all affect the installation. Combustible siding, fiber cement, stucco, and masonry don't carry the same risk, so a contractor should verify the actual assembly instead of treating every wall as interchangeable.
Independent grill-safety guidance recommends at least 5 feet of horizontal clearance from combustible objects and 10 feet of vertical clearance, with dedicated ventilation or a vent hood when the cooking space is covered or partially enclosed. Review the Chubb grill safety guidance before finalizing the island position. The appliance manual and local authority still govern the final installation.
Build the safety zone into the drawing
The hood must exhaust smoke and grease rather than trap them beneath a roof. Cross-ventilation also matters, particularly when a grill or propane cylinder sits inside an enclosed cabinet. An island can look open from the guest side while still holding dangerous pockets of heat or leaked gas.
For propane enclosures, industry guidance commonly calls for upper and lower vent openings, with reported minimums around 20 square inches at both the top and bottom of each island side, along with at least two vent panels. Some guides scale the openings differently for a 20-pound cylinder, reporting 20 square inches high and 10 square inches low. Treat these as planning references, not universal approval. The manufacturer, gas fitter, and local code official should confirm the exact vent design.
Rough in every service before finish work
Plan gas, water, drainage, electrical, lighting, and sound before the footing is poured. An undersized gas line can starve burners, while a missing conduit can force you to dismantle finished stone later.
| Wall or Surface Type | Min. Clearance | Hood CFM | Electrical Circuits |
|---|---|---|---|
| Combustible wall | Confirm with appliance manual and local code | Size to hood and cooking load | GFCI outdoor circuit, plus dedicated appliance circuits as required |
| Fiber cement or stucco | Confirm assembly and appliance rating | Outdoor-rated hood with adequate exhaust | GFCI outdoor circuit, plus dedicated refrigeration circuit if needed |
| Masonry wall | May permit tighter placement, subject to appliance rating | Outdoor-rated hood where covered | GFCI outdoor circuit and separate appliance circuits where specified |
Run a cold-water line to the sink or ice bin, provide drainage where permitted, and separate refrigeration from general receptacles when the load requires it. Place shutoffs and access panels where a technician can reach them without removing stone. If you're comparing premium exterior finishes, research the cost of exterior marble cladding as a material reference, then confirm that the selected finish suits heat, water, and local weather.
The outdoor kitchen ventilation requirements guide can help organize the design conversation, but it isn't a substitute for licensed gas, electrical, and plumbing review.
Designing the Bar Zone to Actually Serve a Crowd
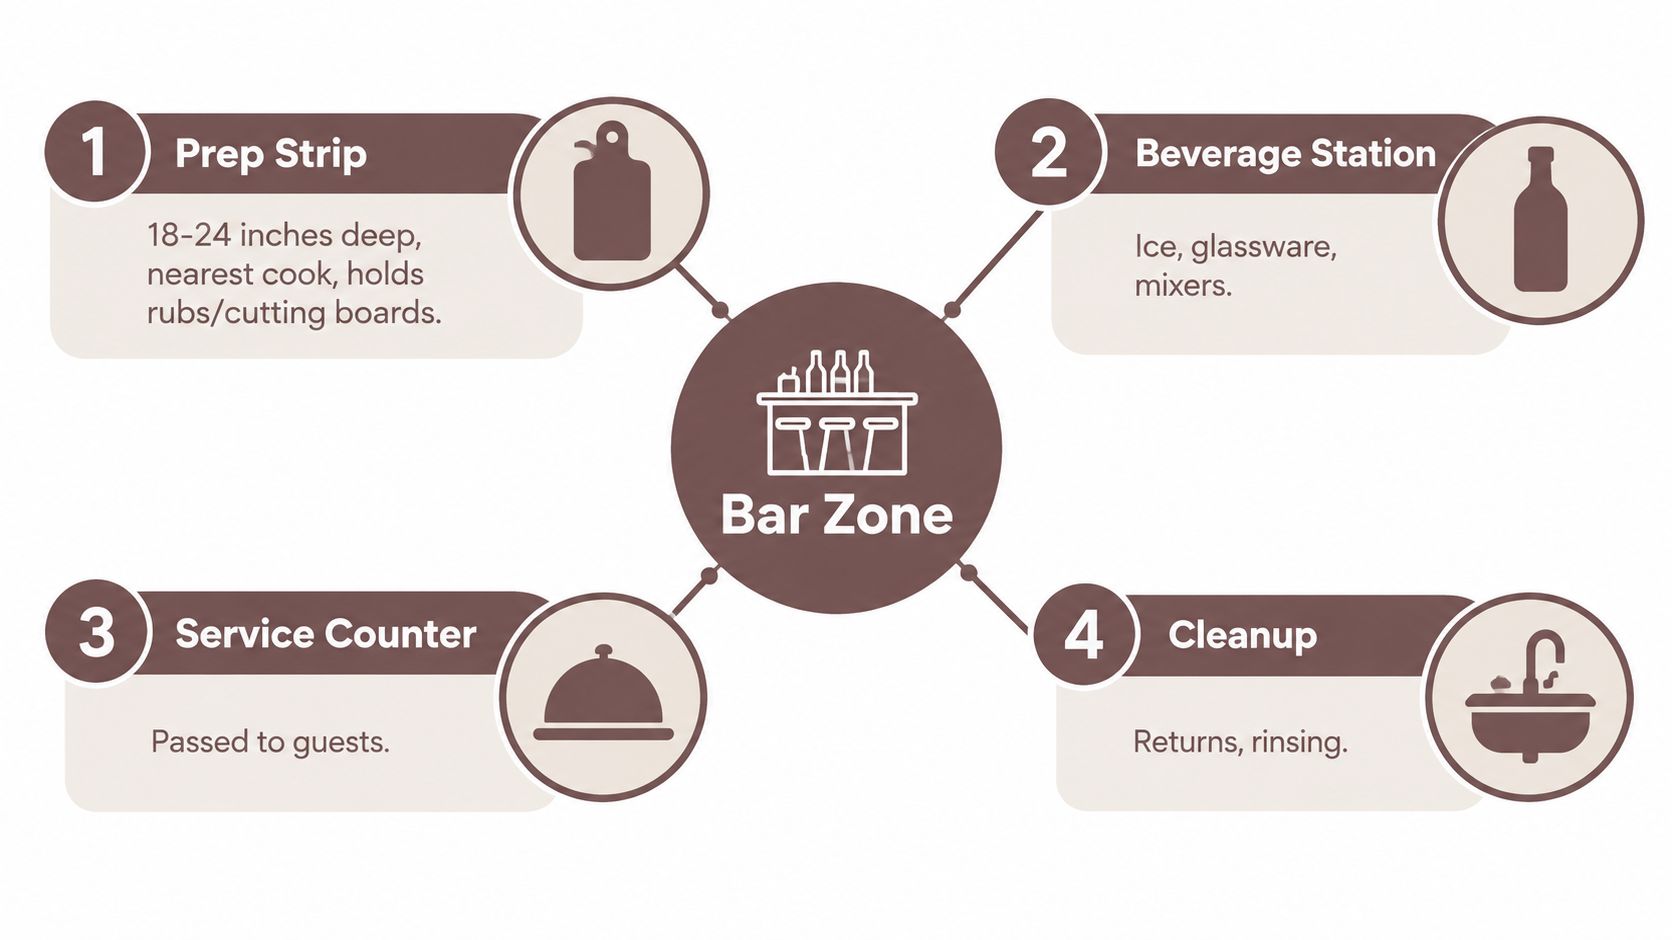
A bar counter isn't just a raised surface with stools. During a gathering, it becomes a prep bench, beverage station, pass-through, landing area, and cleanup point. Give each function a defined strip, or the bar will become cluttered as soon as the first tray arrives.
Assign each strip a job
The prep strip sits nearest the grill and holds cutting boards, seasoning, utensils, and a landing tray. Keep it deep enough for the work you do, with the planned range of 18 to 24 inches serving as a useful starting point.
The pour strip belongs around the sink, ice chest, or beverage center. It should give one person access to ice, glassware, mixers, and waste without blocking the cook or the guest side. A refrigerator positioned below this station reduces the number of drink trips through the cooking area.
The serve strip faces guests. Give plates and glasses a stable landing surface so they don't overhang the edge or get clipped by someone walking past. It is also the point where the grill chef hands off food, so placing it at the end of the cook's natural reach matters more than centering it for symmetry.
The seat strip is the guest side. Select stool and counter heights together, then space seats so people can leave without forcing a neighbor to stand. A backless teak option such as the NEW Montego Backless Bar Chair can keep sightlines open, while an all-weather cushion adds comfort where the climate demands it.
Make cleanup part of service
Return traffic needs a place to go. Put a small sink, bin, or concealed collection point where guests can set down used glasses without reaching across clean food. If the bar will be hosed down, slope the surface toward a concealed channel drain. Otherwise, seal the counter and design for towel cleanup rather than pretending the water will disappear.
The right bar length comes from the number of tasks happening at once, not from the number of stools you can fit. A compact bar with clear service space will outperform a longer counter where the bartender, cook, and guests all occupy the same edge.
Build Order From Footing to First Cookout
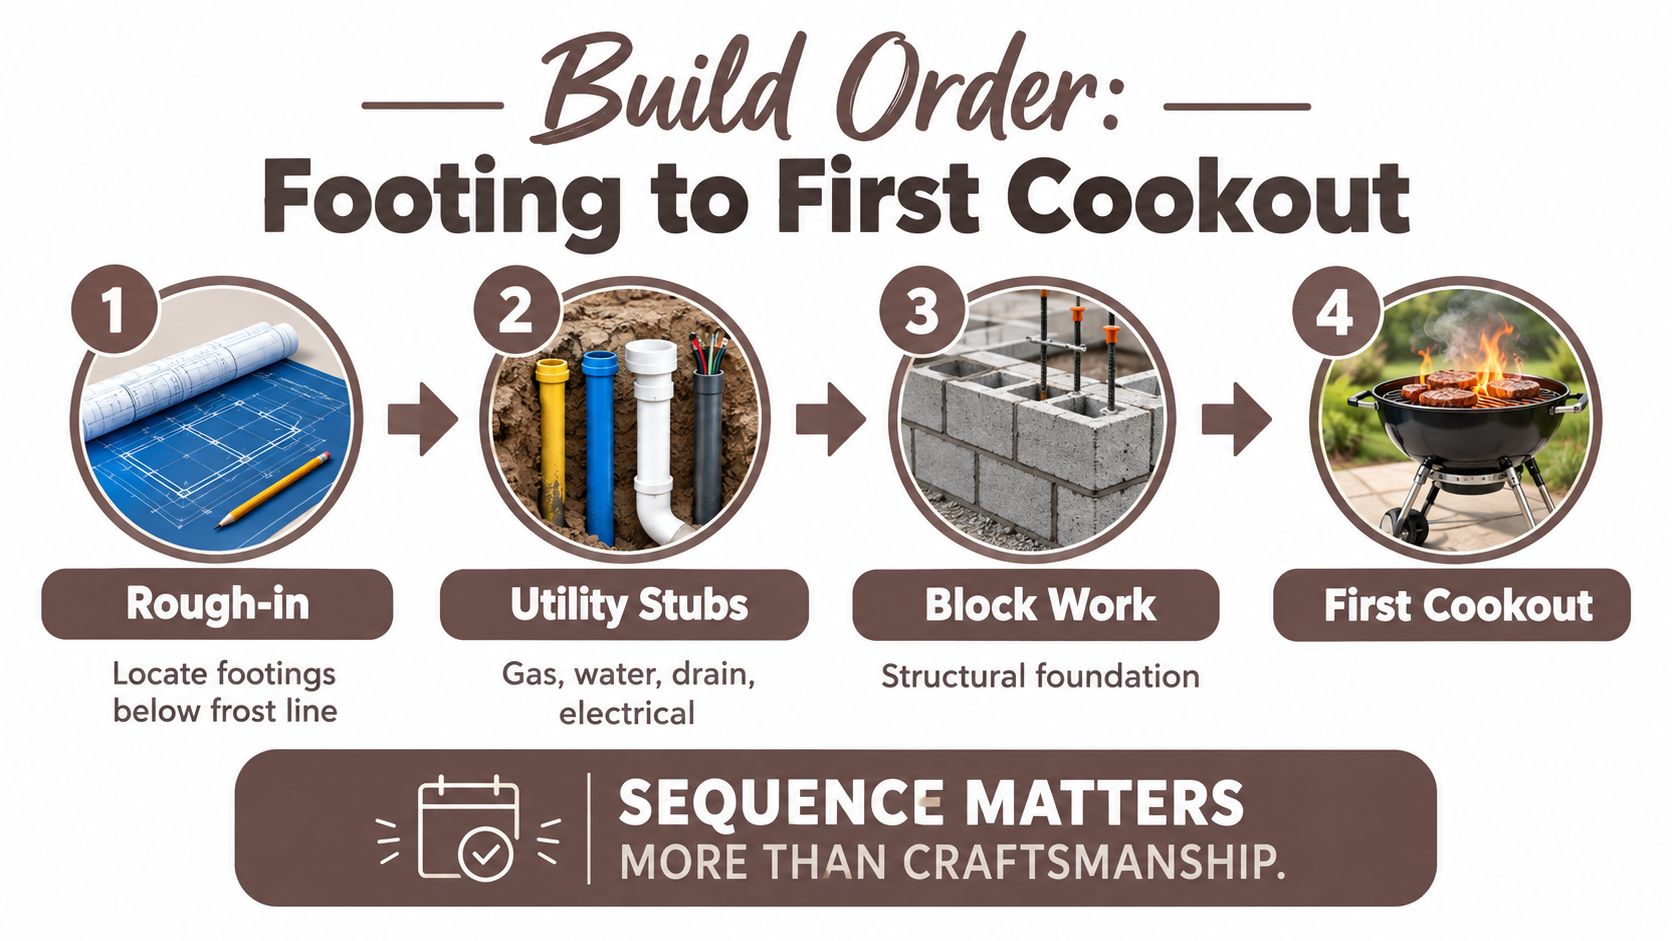
A grill station can look finished and still fail during the first gathering. If the gas sleeve, drain route, or electrical conduit is missing beneath the surface, correcting the mistake may mean removing completed stone. Build for the movement of food, people, and utilities before choosing decorative details.
Rough-in and structure
Start with the site plan, footing locations, drainage direction, appliance dimensions, and local frost requirements. Mark the cook zone, serving route, and guest seating together, then confirm that utility sleeves will reach their final points before concrete closes access. Size footings for the soil, climate, and planned masonry or steel frame.
Check appliance manuals before building the structure. A concrete or masonry base must carry the counter, cladding, doors, and equipment. Decorative veneer should not carry structural weight. Keep the frame level as it rises, because a small error below the grill can become an obvious problem at the bar.
For a step-by-step outdoor kitchen building guide, review the full construction sequence before work begins.
Pressure-test before you cover anything
Install and check gas lines, water lines, and electrical conduits before finish surfaces conceal them. Label each run, photograph its route, and preserve service access around shutoffs and junctions. A hidden connection that cannot be reached turns routine maintenance into demolition.
Use this order on site:
- Site and footing work: Confirm elevations, drainage, frost conditions, and appliance locations.
- Utility stubs: Bring gas, water, drain, electrical, lighting, and communication runs to their planned points.
- Frame and substrate: Build the masonry or metal structure and prepare countertop support.
- Finish surfaces: Install veneer, brick, stucco, tile, or slabs, then seal compatible surfaces.
- Appliances and connections: Install the grill, refrigerator, sink, ice equipment, lighting, and accessories.
- Operational test: Check hood draft, door swings, burner performance, water flow, drainage, and guest traffic.
DIY suits layout marking, surface preparation, some cladding, and sealing when the homeowner has suitable experience. Licensed tradespeople should handle final gas, electrical, and plumbing connections where required, followed by the inspections required in your jurisdiction.
For a practical visual reference, this Woodstock Furniture outdoor cooking setup shows equipment and supporting elements arranged as one working system.
The construction sequence is also demonstrated in this video:
Treat the first cookout as a soft launch. Put food, drinks, serving trays, towels, and waste bins in their actual positions, then observe where guests stand. An empty layout may hide blocked drawers, awkward turns, or a bar that pulls guests into the grill operator's workspace. Reposition movable elements before adding permanent finishes.
Maintenance, Seasonal Care, and Year-One Checkpoints
An outdoor bar with grill is a working system, not a finished photograph. Grease, moisture, heat cycles, and spilled drinks reveal small problems before they become expensive repairs, so maintenance should follow a routine rather than wait for visible failure.
Use a simple weekly reset:
- Grates: Brush them while they're still warm, then remove buildup from the cooking area.
- Stainless surfaces: Wipe with mild soap and a microfiber cloth. Avoid abrasive cleaners that scratch the finish.
- Drip management: Empty trays before grease overflows into the cabinet or onto the patio.
- Water fixtures: Flush the sink and check that drains move water freely.
- Storage: Remove damp towels, inspect door seals, and keep vents unobstructed.
Review the system each quarter
Quarterly care should include stone sealing where the material requires it, hinge and drawer lubrication, and a soap test around accessible gas fittings. Test every outdoor GFCI receptacle using the device's test and reset controls, and inspect covers for cracked seals or water entry.
Look underneath the counters as well. Check vent panels for blockage, confirm that stored items aren't touching hot appliance surfaces, and make sure the hood path remains clear of grease deposits. If a refrigerator or ice machine is installed, clean its air intake and keep the surrounding cabinet free of clutter.
Protect it through the seasons
In freezing regions, winterize water lines with compressed air, shut off and cap the gas line at the house when appropriate, and protect the island with breathable canvas. Plastic covers can trap moisture against cabinets and stone, encouraging corrosion and staining. In mild climates, regular cover cycles and ultraviolet protection for suitable countertop materials may be enough, but salt air and intense sun still deserve frequent inspection.
Use the first year to record how the installation behaves:
- Settlement: Re-level pavers or adjacent hardscape if movement changes drainage or seating.
- Thermal movement: Inspect veneer, joints, and counter edges after the first major heat cycles.
- Drainage: Confirm that water leaves the bar and grill area instead of collecting beneath cabinets.
- Air movement: Note smoke drift, hot spots, and cold drafts near seating.
- Hardware: Retighten loose handles and verify that doors remain aligned.
- Workflow: Ask whether guests naturally use the intended serving route or keep cutting through the cook zone.
The broader cooking habit is no longer limited to summer weekends. Gitnux's outdoor cooking summary reports USD 8.2 billion in U.S. outdoor cooking retail sales in 2022 and says 61% of U.S. consumers grill at least once per month year-round. That makes weather protection, storage, lighting, and reliable utility access practical parts of the design, not optional extras.
Flavor planning matters too. A 2026 BBQ trends report summarized by Morningstar says 50% of consumers cook with BBQ flavors multiple times a week and more than 80% do so at least monthly, while describing interest in smoke-forward, sweet-heat, and globally inspired profiles. A useful outdoor bar with grill should support the way you cook, whether that means a smoker, hot plate, refrigerator, prep sink, or a simple counter that keeps finished food away from raw ingredients.
UrbanManCaves offers outdoor kitchens, BBQ grills, beverage centers, kegerators, fire features, patio heaters, and outdoor-ready furniture for homeowners building more functional entertaining spaces. Visit urbanmancaves.com to compare equipment and seating that can support your planned grill workflow, bar service, and year-round backyard use.


