

Last Updated: October 29, 2026
Quick Summary
To calibrate gas grill thermometer dials, test the probe in ice water, which should read 32°F, and in boiling water, which should read 212°F at sea level, then turn the calibration nut about an eighth of a turn at a time. Recheck after every adjustment until the reading is within a few degrees of the reference.
- Use ice water at 32°F as the low-end reference and keep plenty of ice in the glass.
- For the high end, adjust the boiling target for your altitude, dropping about 1.8°F per 1,000 feet.
- Turn the calibration nut about an eighth of a turn at a time and retest after each change.
- Digital units use a stored offset entered in calibration mode instead of a mechanical nut.
- Check your grill thermometer at least twice a year, and sooner if the needle sticks or cooking times drift.
Table of Contents
- Tools and Setup You Need Before Calibrating
- Ice Water Test for Thermometer Accuracy
- Boiling Water Thermometer Test at Altitude
- How to Adjust a Grill Lid Thermometer
- How Often to Calibrate a Thermometer
- Booking Your Next Grill Upgrade Check
- Frequently Asked Questions
If your gas grill thermometer says 400 degrees but your steak is still raw in the middle, the gauge is probably the problem, not the cook, so learning how to calibrate gas grill thermometer units is worth your time.
Most grill thermometers are small analog dials mounted in the lid. A dial that read true when the grill was new can be off by 25 degrees or more after a few seasons of use. Digital thermometer grill models offer an alternative to continuing to recalibrate an old dial.
Here is what usually causes the drift:
- Heat cycling: Repeated heating and cooling loosens the internal spring and shifts the needle.
- Grease and smoke residue: Buildup on the probe or inside the housing can slow response.
- Bumps and vibration: Moving the grill or closing the lid hard can knock the mechanism out of place.
A common mistake is assuming the grill itself is faulty. In many cases the burners work fine and only the gauge needs adjusting. Test the thermometer before you replace anything.
Tools and Setup You Need Before Calibrating
You do not need specialized equipment. Gather these items before you start:
- A reliable reference thermometer, such as an instant-read digital probe
- A glass of ice water and a pot of boiling water
- A small flat-head or Phillips screwdriver, depending on your model
Clean the thermometer probe and the surrounding lid area first. Grill cleaner and degreaser helps clear grease from the probe and lid before testing. Grease can make the needle stick and give you a false reading during the test.
Work in a shaded area if possible. Direct sun and wind can affect the reference readings, so a calm spot gives you cleaner results.
Ice Water Test for Thermometer Accuracy
The ice water test is the simplest way to check whether your gauge reads accurately near the low end of its range.
- Fill a glass with ice, then add cold water until the ice is just covered.
- Stir for about 30 seconds and let the mixture sit for two minutes.
- Insert the thermometer probe into the center of the ice water, without touching the glass bottom.
- Wait until the needle settles, then read the dial.
If the needle reads 32 degrees, the gauge is accurate at that point. If it reads higher or lower, note the difference.
Watch out: an ice bath that is mostly water and not enough ice drifts above 32 degrees fast.
The two reference tests below cover the low and high ends of the range, with the key numbers and cautions from the article. Analog-thermometer grill models are another option to compare if recalibration is not worth the effort.

| Test | Target reading | Key tip |
|---|---|---|
| Ice water | 32°F | Keep plenty of ice in the glass |
| Boiling water (sea level) | 212°F | Hold probe in steam, not liquid |
| Boiling water at 5,000 ft | ~203°F | Subtract ~1.8°F per 1,000 ft |
| Simmering water | 10-15°F below boil | Too cool to test accurately |
| Recalibration step size | ~1/8 turn | Retest after each adjustment |
Boiling Water Thermometer Test at Altitude
The boiling water test checks the high end of the range. At sea level, water boils at 212°F, and that is the number most thermometer manuals tell you to target. The problem is that almost no one cooks at sea level, and the boiling point drops steadily as elevation rises. A thermometer that reads 210°F in a rolling boil is perfectly accurate in Denver and 2°F low in Miami.
The Altitude Correction, Worked Out
The standard approximation is that the boiling point drops about 1.8°F for every 1,000 feet of elevation gain, or roughly 1°F per 500 feet. That is close enough for grill work. Here is the arithmetic for common elevations:
- Sea level to 500 ft: boiling point 212°F. No correction needed.
- 1,000 ft: 212 − 1.8 ≈ 210°F
- 2,000 ft: 212 − 3.6 ≈ 208°F
Find your elevation with a phone's built-in altimeter app or a topographic map before you run the test. Write the corrected target on your notepad next to the ice water result so you compare both ends of the range against the right numbers.
Running the Test Correctly
- Bring a pot of water to a full rolling boil, not a simmer. A simmer is 10°F to 15°F below boiling and will make an accurate thermometer look broken.
- Hold the probe in the steam just above the water surface, not in the liquid. Submerging the probe lets it touch the pot bottom, which runs hotter than the water and skews the reading upward.
- Keep the probe off the pot walls for the same reason.
- Wait until the needle or display stops moving, usually 30 to 60 seconds, then read it.
- Compare the reading to your altitude-corrected target, not to 212°F.
What the Result Tells You
If the thermometer reads within 2°F of your corrected target, the high end of the range is accurate. If it reads high or low by more than that, note the direction and size of the error. A dial that is accurate in ice water but 8°F off in boiling water has a span error, not a zero error, turning the calibration nut will fix one end and throw off the other.
Echelon Digital Temp w/ Magic Window NG →
High-Altitude Cooking Adjustments
Once you know your corrected boiling point, apply the same logic to cooking targets. At 5,000 feet, water boils at roughly 203°F, which means a brisket stall that depends on evaporation happens at a lower temperature and food dries out faster. Cooks at elevation often run their grills lower than sea-level recipes call for. Your calibrated thermometer is what lets you make that adjustment with confidence instead of guessing.
How to Adjust a Grill Lid Thermometer
Most analog grill thermometers have a calibration nut on the back of the dial stem. Turn it with a small screwdriver or pliers.
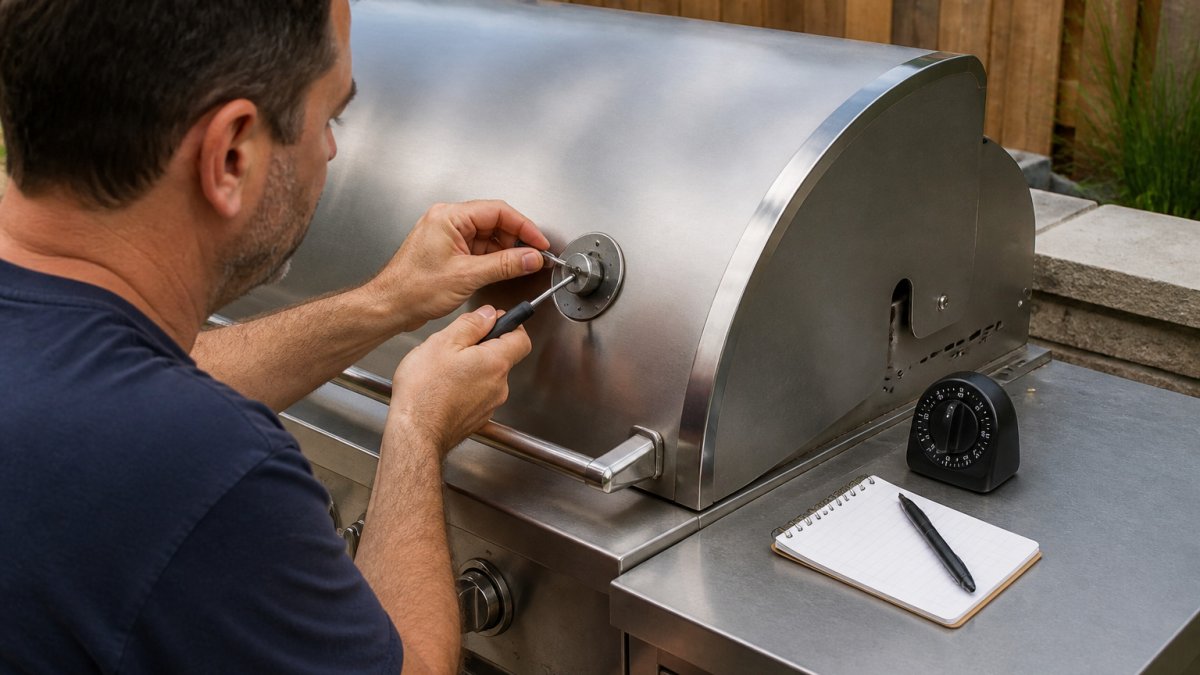
- Remove the thermometer from the lid if your model allows it, or work from the back with the lid open.
- Turn the calibration nut a small amount, about an eighth of a turn at a time.
- Retest in ice water or boiling water after each adjustment.
- Stop when the needle reads within a few degrees of the reference.
Adjust slowly. Overturning the nut can strip the mechanism, and a stripped part is harder to fix than a small offset.
Resetting a Digital Grill Thermometer
Digital units do not have a calibration nut, and this is where most online guides stop short.
Step 1: Run the ice water test first. You cannot enter an offset until you know your error. If the probe reads 35°F in a properly built ice bath, your offset is -3°F.
Step 2: Enter calibration mode. Button sequences vary by brand, but three patterns cover most consumer units:
- Hold-to-enter: Press and hold the CAL or SET button for 3 to 5 seconds until the display flashes or shows "CAL." Release, then use the up/down buttons to dial in your offset.
- Two-button hold: Press and hold two buttons simultaneously (commonly the power and unit buttons, or the mode and up buttons) for 3 to 5 seconds. The display flashes the current offset value.
- Hidden reset pinhole: Some compact units have a recessed pinhole on the back. Straighten a paper clip and press it for 2 seconds to force a factory reset, then re-enter your offset from scratch.
Step 3: Confirm and retest. After entering the offset, return the probe to the ice bath. The display should now read 32°F.
When a digital probe cannot be saved. If the display will not enter calibration mode, if the reading jumps by more than 10°F between two ice baths, or if the probe reads wildly different temperatures when you wiggle the cable, the sensor or the thermistor lead is damaged. No offset will fix a broken sensor. Replacement probes are the correct fix in that case, and they are usually cheaper than a new unit.
Matching Analog and Digital Readings
If you run both a lid dial and a digital probe, calibrate the digital unit first. The digital probe is your reference instrument, and a calibrated digital reading is what you compare the analog dial against. Adjust the analog nut until the dial matches the digital probe in the same ice bath. Doing it in the reverse order, trusting the analog dial to calibrate the digital unit, compounds error instead of removing it.
How Often to Calibrate a Thermometer
Check your grill thermometer at least twice a year: once before the start of grilling season and once after the last cookout of the year. Heavy users, such as those who smoke meat every weekend, should test every few months.
Calibrate sooner if you notice any of these signs:
- The needle sticks or moves erratically
- The reading changes when you bump the lid
- Food cooks faster or slower than your timing suggests
Testing takes less than 15 minutes. Consistent checks prevent ruined meals and wasted fuel.
Booking Your Next Grill Upgrade Check
If your thermometer keeps drifting after repeated adjustments, it may be time to upgrade rather than keep recalibrating. The Echelon Digital Temp w/ Magic Window NG is a factory-style digital upgrade for select Echelon grills, and the Echelon E1060s Portable Diamond Gas Grill with Digital Thermometer & Magic View Window suits readers comparing a new unit against recalibrating an older one.


Before you test or adjust, clean the probe and lid area with a grill cleaner or degreaser so grease does not throw off your readings. Recalibration is worth doing when your current gauge is still reasonably close. When it is not, a new unit is often the simpler fix, and the readings stay accurate for longer.
Frequently Asked Questions
Do meat thermometers need to be recalibrated?
Yes, most meat and grill thermometers should be checked periodically because repeated heating, dropping, and exposure to grease can shift their readings. Run an ice water test or boiling water test to see whether the reading is off. If the thermometer is within a few degrees of 32 degrees Fahrenheit in ice water or 212 degrees at sea level in boiling water, it is accurate enough for most grilling. If it is off by more, adjust it if it has a calibration nut or replace it if it does not.
Can you calibrate a grill thermometer with ice water?
Yes. The ice water test for thermometer accuracy is the simplest method. Fill a glass with crushed ice, add cold water, stir, and wait about three minutes for the mixture to settle at 32 degrees Fahrenheit. Insert the probe without letting it touch the glass. If the dial reads a different number, adjust the calibration nut on an analog thermometer, or use the reset function on a digital model. Repeat the test to confirm the reading holds.
How frequently should a thermometer be calibrated for accuracy?
Check your grill thermometer before the start of each grilling season and any time it has been dropped or exposed to high heat. Most home cooks benefit from a quick check every few months if they grill often. Digital thermometers should be verified more often than analog ones, since their sensors can drift without any visible sign. Keep a short log of your test results so you can spot a pattern of drift early.
What should I do if my grill thermometer cannot be adjusted?
Some thermometers, especially sealed or built-in units, have no calibration nut. In that case you cannot correct the reading directly, so compare it against a reliable instant-read thermometer and note the offset, such as reading 15 degrees high. Subtract that offset from what you see during cooking. If the error is large or inconsistent, replacing the thermometer is more reliable than working around it. A Echelon Digital Temp w/ Magic Window NG is one factory-matched option for select Fire Magic models.


