

Table of Contents
- Foundation and Site Preparation for Fire Pit Installation
- Outdoor Fire Pit Safety Clearance Standards
- How to Install a Fire Pit on a Paver Patio
- Gas Fire Pit Burner Installation Requirements
- Choosing Between Wood-Burning and Gas Fire Features
- Permitting, Building Codes, and Legal Compliance
- Maintenance and Seasonal Care for Longevity
- Conclusion
- Frequently Asked Questions
Last Updated: October 2, 2026
Foundation and Site Preparation for Fire Pit Installation
A solid foundation determines whether your fire pit lasts decades or fails within years. Fire pit installation begins with proper site preparation.

Select a location at least 10-15 feet from structures, overhanging branches, and combustibles. Clear grass, roots, and debris to bare soil. For soft or clay soil, excavate 4-6 inches and backfill with compacted gravel for drainage.
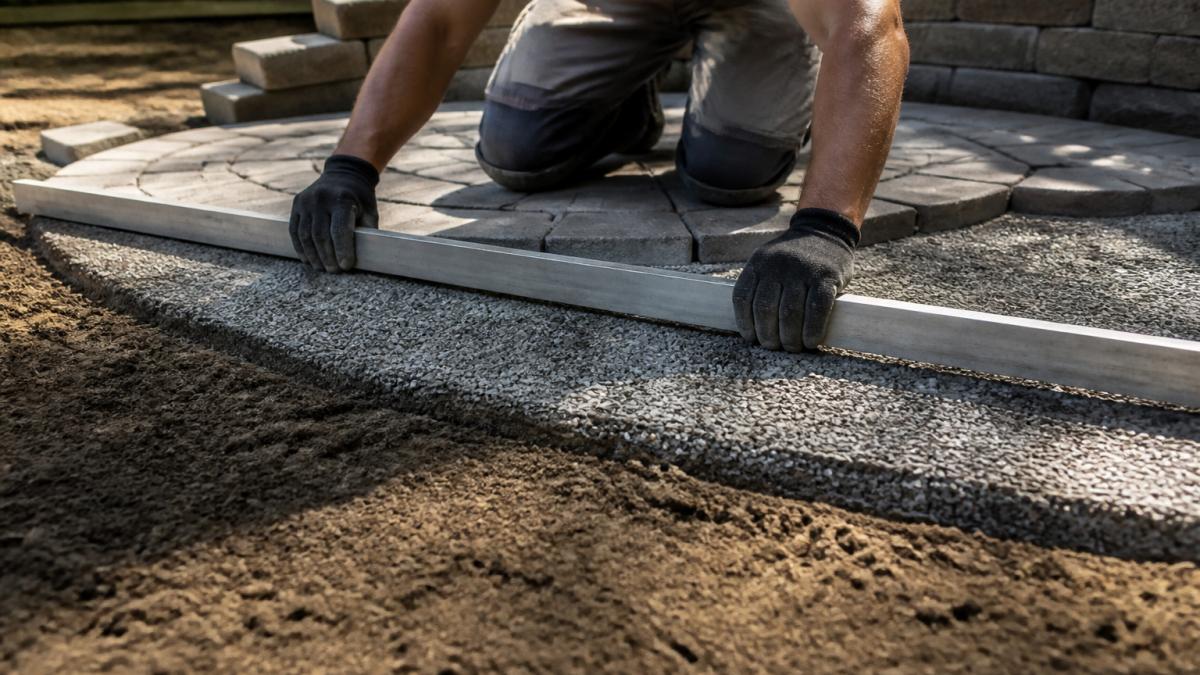
Lay landscape fabric, then set pavers on 1 inch of sand over 2-3 inches of compacted gravel. Level the surface carefully, even slight slopes stress joints and create safety gaps. Tamp firmly as you work.
Outdoor Fire Pit Safety Clearance Standards
Safety clearances are fire codes enforced by building departments. Most jurisdictions follow the International Fire Code, which specifies minimum distances from structures, trees, and combustibles.
Maintain 10-15 feet of clearance from structures. Clear overhead branches to 12 feet above the fire feature to prevent ember ignition.
Keep the fire pit at least 10 feet from fences, railings, and stored materials. Radiant heat can ignite combustibles 8-10 feet away, so wood piles and mulch should be further back.

Gas fire pits require proper ventilation. Never enclose the pit or place it in a recessed area without air vents, trapped heat damages the ignition system and creates carbon monoxide hazards.
How to Install a Fire Pit on a Paver Patio
Fire pit installation on pavers requires attention to base, ring placement, and gas line routing.
Position the fire pit ring on the paver base and level it in all directions. Adjust the sand bed if the ring rocks or tilts, instability stresses gas connections and creates unsafe gaps.
Mark the gas line location. Most rings have a port at the base where the line enters. Measure from this port to your fuel source (propane tank or home gas line).
Lay out the gas line path carefully, keeping it away from high-traffic areas and protected from foot traffic. If running the line across the patio, consider burying it slightly below the paver surface or routing it along the edge where it's less visible. The National Fuel Gas Code specifies that gas lines must be protected from damage and clearly marked if exposed.
Position the fire ring inside the pit frame and secure per manufacturer instructions. Fire glass or lava rock distributes heat and creates visual effect. The burner must be fully supported and cannot shift during operation.
Test the setup before lighting. Check for gas leaks using soapy water on all connections. Verify the ignition system triggers the pilot light and flame pattern is even.
Gas Fire Pit Burner Installation Requirements
Gas fire pits require precise burner, regulator, and ignition installation. Improper setup causes gas leaks, incomplete combustion, or ignition failures.
The burner assembly distributes gas evenly across the fire ring. Most use perforated pipes (multiple flames) or T-shaped burners (linear flame). Choice depends on aesthetic preference.
Your fire pit propane installation kit or natural gas kit includes a regulator, valve assembly, and connecting hardware. Urban Man Caves offers both the Fire Pit Propane Installation Kit with Chrome Key Valve ($275.99) for propane systems and the Fire Pit Natural Gas Installation Kit with Chrome Key Valve ($259.99) for homes with hard-piped natural gas lines.
The regulator reduces tank or line pressure to safe burner levels. Without it, excessive pressure damages burner ports. The key valve provides manual control and prevents accidental ignition.
Fire Pit Propane Installation Kit with Chrome Key Valve →
For propane systems, connect the regulator directly to your propane tank, then run the gas line to the fire pit. For natural gas, connect the kit to your home's gas stub (typically a 3/4-inch line). Apply thread sealant to all male connections before tightening, this prevents gas leaks at the joints.
Choosing Between Wood-Burning and Gas Fire Features
The choice between wood-burning and gas comes down to convenience, aesthetics, maintenance, and local regulations. Each has genuine trade-offs.
Wood-burning fire pits offer authentic flame character and the sensory experience of real fire, crackling sounds, wood smoke, and the ritual of tending the flames. They require no gas line installation and work anywhere you have clearance. However, they produce ash, require regular cleaning, and depend on dry firewood availability. Wood smoke also bothers some neighbors and can trigger local air quality restrictions during fire season.
Gas fire pits ignite instantly with a key turn, produce no ash, and burn cleanly without smoke. They're ideal for entertaining because you don't need to manage fuel or tend the fire. The downside is installation complexity, you need either a propane tank or a hard-piped natural gas line. Gas flames also lack the authentic crackling and wood-scent appeal that some people prefer.
For most homeowners in suburban settings, gas is the practical choice. It's cleaner, more convenient, and easier to control. If you're in a rural area with space and no gas line nearby, wood-burning might be your only option (unless you're willing to run an expensive gas line).
Consider your local fire codes as well. Some municipalities restrict wood-burning during certain seasons or require air quality permits. Gas fire pits typically face fewer restrictions because they produce minimal emissions.
Permitting, Building Codes, and Legal Compliance
This is the section most DIY guides skip, and it's often where homeowners run into problems. Building permits exist to protect your safety and your property value.
Most jurisdictions require a permit for permanent fire features, especially gas-fired installations. A permit triggers an inspection, which verifies that your installation meets local fire codes, gas line standards, and electrical requirements. Skipping the permit might save money upfront, but it can complicate home sales, void your homeowner's insurance, or result in fines if a neighbor complains.
Check with your local building department before starting. They'll tell you whether a permit is required, what inspections are needed, and what code standards apply in your area. Many departments have online permit guides or can email you the specific requirements.
Gas line installations must comply with the National Fuel Gas Code developed by NFPA, which sets pressure ratings, fitting standards, and safety protocols. If you're not a licensed gas fitter, hire one for the final connection to your home's gas line or propane tank. This is not a cost-cutting area, a gas leak can be fatal.
For propane systems, ensure your tank is properly grounded and located at least 10 feet from doors or windows. The regulator must be rated for outdoor use and protected from weather.
Maintenance and Seasonal Care for Longevity
After each use, let the fire pit cool completely, then brush out ash and debris. For gas pits, wipe the burner assembly and fire glass with a dry cloth to remove dust and pollen. For wood-burning pits, remove ash and check the fire ring for cracks or rust.
Conclusion
A custom outdoor fire pit installation guide requires careful attention to foundation, safety clearances, gas line routing, and local code compliance. The work is straightforward if you follow the steps methodically, but skipping any section creates problems that surface months or years later.
| Installation Phase | Key Requirement | Common Mistake |
|---|---|---|
| Foundation | Level paver base with compacted gravel | Skipping compaction; settling occurs later |
| Safety Clearance | 10-15 feet from structures and trees | Measuring from pit center instead of edge |
| Gas Line | Proper connections with thread sealant | Loose fittings; gas leaks |
| Burner Assembly | Level, secure positioning | Burner shifts during operation |
| Permits | Local building department approval | Skipping permits; complications at sale |
| Maintenance | Annual inspection and seasonal prep | Neglecting ignition system checks |
Frequently Asked Questions
What materials should go in the bottom of an outdoor fire pit?
The base layer depends on your fuel type. For wood-burning pits, use fire-rated pavers or a concrete base at least 4 inches thick to contain ash and prevent ground moisture from rising. For gas fire pits, a solid concrete foundation prevents settling and gas line damage. Add a layer of fire glass or lava rock above the base to distribute heat evenly and protect the burner assembly from debris. These materials also improve appearance while maintaining proper ventilation and air vents underneath.
What are the typical safety clearance requirements for a custom fire pit?
Most building codes require fire pits to be at least 15 feet from structures like houses, sheds, or wooden decks, and 10 feet from property lines. Keep combustible materials (mulch, wood piles, low branches) at least 10 feet away. Overhead clearance should be 12 feet minimum to prevent heat damage to soffits or tree canopy. Always verify local codes with your municipality before installation, as some jurisdictions have stricter outdoor fire pit safety clearance standards based on fire district regulations.
Do I need a permit to install a custom fire pit?
Yes, most municipalities require a permit for permanent fire features, especially those with gas lines. Permitting ensures your installation meets local building codes, electrical standards, and fire safety protocols. Gas line work typically requires inspection by a licensed professional or certified installer. Contact your local building department early in the planning phase to understand requirements, fees, and inspection schedules. Skipping permits can result in fines and insurance complications if damage occurs.
How do I know if my fire pit installation is safe?
A safe installation includes a solid foundation with proper drainage, correct clearance distances from structures and combustible materials, proper gas pressure regulation via a regulator, and a reliable shut-off valve. For gas systems, verify all connections are gastight using soapy water (bubbles indicate leaks). Wood-burning pits need proper ventilation and air vents to prevent smoke backup.


